Friday, December 29, 2023

Fresh and Flavorful: How to Cook Ginisang Sitaw Like a Pro


The Culinary Journey Begins

Embark on a culinary exploration as we delve into a beloved Filipino staple: Ginisang Sitaw. This stir-fried green bean dish is a harmony of simplicity and flavor, commonly served across households in the Philippines. Perfectly suitable for a wholesome family dinner or a nostalgic nod for those abroad, Ginisang Sitaw promises a flavorful experience with everyday ingredients.

Pillars of Flavor: The Essential Ingredients

Our journey commences at the heart of any dish: the ingredients. For Ginisang Sitaw, these pillars are unassuming yet foundational. The freshness of 0.5 kg of sitaw, commonly known as long beans, sets the stage. To create the symphony of flavors, we add aromatics: 4 cloves of garlic, 1 pc of onion, and 2 pcs of tomato. They are the silent heroes, infusing depth into our dish.

The Starting Blocks: Preparatory Steps

Before lighting the flame, thorough preparation ensures efficiency and excellence in cooking. Dice your tomatoes, mince your garlic, and slice your onion thinly, ensuring each will release its full potential into the oil's embrace. Cut the sitaw into manageable 2-inch lengths, carefully discarding any tough ends, for they have no place in our dish's tender composition.

The Orchestra of Heat: Stir-Frying Fundamentals

Begin by coating the pan with 2 tbsp of vegetable oil, igniting the transformative process of stir-frying. As the oil shimmers, heralding readiness, the garlic and onions are first to dance in the heat. Their sizzle is the prelude to flavor, an invitation to the tomatoes that follow promptly, collapsing into a savory base.

The Meat of the Matter: Introducing Ground Pork

As the aromatics meld, introduce 0.5 cup of ground pork, breaking up any clumps to ensure each morsel bronzes evenly. The pork is more than mere sustenance; it's the textural contrast, the rich backbone against which the sitaw will shine. Through constant stirring, coax out its innate juiciness and umami, setting the stage for the vegetables to enter.

The Veggie Star: Sitaw Takes Center Stage

Now for the eponymous sitaw—these green streaks of texture and color. As they join the sizzling medley, the beans begin their transformation. This step is critical: stir well and often, ensuring the sitaw absorbs every flavor note from the pan's occupants.

The Alchemy of Simmering: Liquids and Seasonings

With the sitaw glistening from the heat, it's time to add 0.5 cup of water, turning the heat down to let the dish simmer. This is not mere cooking; it's alchemy, where the mundane becomes exquisite. The water steams into the mixture, infusing the sitaw and pork, marrying flavors in the gentle boil of our culinary cauldron.

A Matter of Taste: Perfecting Flavors

Here, we taste and adjust. Our Ginisang Sitaw cannot simply be good; it must be perfect. Season with salt and pepper, wielding these common seasoners as magic wands to enhance the natural goodness. Be guided by your palate, let it lead you to the pinnacle of taste.

The Final Flourish: Presentation and Garnish

Once the sitaw is tender and the pork succulent, a final check ensues before turning off the flame. Plate your creation with care and garnish, perhaps with a sprinkle of crisp, green onions or a side of steamed rice. The presentation breathes life into flavors, making the first bite not just a taste but an experience.

The Culinary Encore: Reflections on the Dish

As our Ginisang Sitaw cools slightly, a moment to reflect. This dish is not merely sustenance, but a testament to the rich tapestry of Filipino cuisine, an ode to the simple yet profound joy of cooking with passion. The intertwining flavors represent a cultural narrative, told in every home-cooked meal.

Your Turn to Shine

With the harmony of garlic, onions, tomatoes, ground pork, and sitaw, your Ginisang Sitaw is set to mesmerize. Remember that cooking is an art tempered by practice and emboldened by creativity. As you plate up and serve, you're not just offering food, but a piece of heritage, a conversation of flavors that speaks of home, family, and tradition.


Wednesday, December 27, 2023

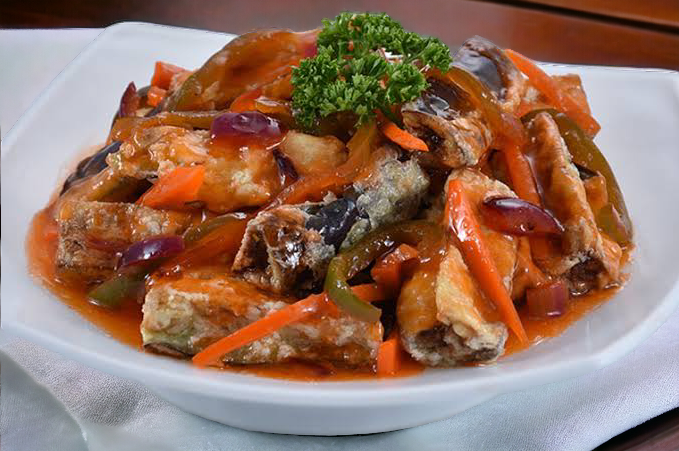
The Sweet Symphony of Sweet and Sour Eggplant: A Culinary Ode


Embracing the Aubergine

The sweet and sour eggplant is a dish that sings with vibrant flavors and textures. As an expert in blending taste and health, I hold this dish dear. Each bite is a step towards mastering the artful balance of sweet and zesty. To embark on this culinary journey, you'll need an armor of 4 cups (500g) of quartered eggplant—a vegetable that is as nutritious as it is delicious.

Preparing the Stage: Eggplant Ready
Firstly, let's give the eggplant its due spotlight. Start by quartering your eggplant into bite-sized pieces, allowing them to be the perfect vessel for the sweet and sour melody. This vegetable is not only a source of dietary fiber but also carries essential nutrients to elevate your dish’s nutritional value.

The Prelude: Crispy Coating
In this section, we’ll dive into creating the perfect crispy coating. Take 2 pcs. (100g) of eggs and beat them, setting the stage for a crunchy exterior. Whisk in harmony until fully blended. Next, the eggplant makes its first dance with the cornstarch. Dust each piece in the half cup (80g) of cornstarch, ensuring a light but adequate coat, which promises a golden crispness upon frying.

Act I: The Frying Pan Waltz
Now comes the time to heat 2 cups (450ml) of cooking oil in a pan for deep frying. The oil needs to be just the right temperature—hot enough to sizzle but not so hot as to burn. Introduce the eggplant pieces to the pan, ensuring they are not overcrowded. Fry until each piece is a golden-brown marvel.

Act II: Aromatic Ensemble
Once the eggplant has exited the stage, let’s turn to the sauté. Utilize 2 tbsps. (30g) of cooking oil to sauté the 1/4 cup (37g) of onion, sliced, until its fragrance sets the sensory scene. It’s here that your kitchen starts to hum with the prelude of aromas that indicate something delicious is in the making.

Intermission: Vegetable Medley
Following the onions, introduce the chorus of vegetables. Add 1 1/2 cups (120g) of thinly sliced bell pepper and 1 cup (90g) of julienned carrots to the pan. These colorful performers add not only a visual appeal but also a crunch and sweetness that perfectly complement the eggplant’s softness.

The Flavor Orchestra: Sweet and Sour Harmony
To bring this culinary composition together, the sweet and sour sauce enters the fray. A balance of sweetness, tartness, and umami is what you’re aiming for—a sauce that clings to the vegetables and infuses them with its character.

Soy Sauce Solo: Umami Undercurrent
A pivotal turning point in our recipe is the addition of 1 tsp. (5g) of soy sauce. This umami-rich ingredient isn't merely an accompaniment; it is an essential undercurrent that ties the disparate flavors into a cohesive whole.

Culmination: The Grand Assemblage
It’s now time to marry the crispy eggplant with the saucy vegetable medley. Gently fold the eggplant into the pan, coating each piece with the sauce. The heat should be just enough to warm everything through, allowing the flavors to bind in a delicious union.

Finale: Plating the Masterpiece
Presentation is key. Serve the sweet and sour eggplant hot, perhaps over a bed of steamed rice or alongside your favorite grain. The final dish is a masterpiece of contrasting flavors and textures, a true testament to the culinary capabilities of the humble eggplant.


Saturday, December 23, 2023

Savor the Flavors: Learn to Cook Perfectly Balanced Pork Estofado


Welcome to this comprehensive guide on how to cook the mouthwatering dish known as Pork Estofado. In this blog post, we will provide expert step-by-step instructions for creating a delectable and flavorsome pork dish that will impress even the most discerning of palates. With the perfect blend of ingredients and a touch of culinary finesse, you'll soon be able to savor a dish that captures the essence of Filipino cuisine. So dust off your aprons, sharpen those knives, and let's dive into the world of cooking Pork Estofado!

Understanding the Recipe

Before we embark on the cooking journey, let's take a moment to familiarize ourselves with the key ingredients and their role in creating a tantalizing Pork Estofado. This recipe calls for 2 tbsp of vegetable oil, 1 pc carrot, 3 pcs saba banana, 4 cloves of garlic, 1 pc onion, 0.5 kg of pork shoulder, 0.25 cup of white vinegar, 1 pc bay leaf, and 1 cup of water.

Preparing the Ingredients

To ensure the utmost flavor and tenderness in your Pork Estofado, proper preparation of the ingredients is vital. Start by peeling and finely chopping the carrots, garlic, and onion. Cut the saba bananas into bite-sized pieces. Trim any excess fat from the pork shoulder and slice it into cubes. Ensure all the ingredients are ready and within reach for effortless cooking.

Searing the Pork

To infuse the pork with a rich, caramelized flavor, begin by heating 2 tbsp of vegetable oil in a large skillet over medium-high heat. Once the oil is hot, carefully add the cubed pork shoulder, ensuring they have enough space to sear evenly. Allow the pork to cook undisturbed for a few minutes until it develops a brown crust. Flip the pork pieces to sear the other side, ensuring all sides are evenly cooked. Once seared to perfection, transfer the pork to a plate, and set it aside momentarily.

Building Flavors with Aromatics

Now it's time to add depth and complexity to your Pork Estofado by sautéing the aromatics. In the same skillet, add the finely chopped garlic and onion, and cook them until they turn golden brown and become aromatic. As the flavors intensify, the kitchen will fill with an irresistible scent that will have your taste buds tingling in anticipation.

Braising the Pork

Return the seared pork to the skillet, ensuring it melds harmoniously with the sautéed aromatics. Add the chopped carrots, saba bananas, and the bay leaf to the mixture, enhancing the flavors and adding a touch of sweetness. Now, pour in 0.25 cup of white vinegar, allowing it to deglaze the pan and infuse the pork with a subtle tanginess. To further tenderize the meat, add 1 cup of water, ensuring the pork is partially submerged.

Simmering to Perfection

Bring the mixture to a boil, then reduce the heat to a gentle simmer. Cover the skillet and let the Pork Estofado cook slowly over low heat. This method allows the meat to absorb all the flavors while becoming tender and succulent. During this stage, be patient, as the longer the simmering time, the more robust the flavors will become.

Adjusting the Seasoning

After approximately an hour of simmering, it's time to taste the Pork Estofado and adjust the seasoning to suit your preferences. The dish should strike a harmonious balance between sweetness, acidity, and savory flavors. If desired, add a pinch of salt or a touch more vinegar to intensify the taste. Remember to let the flavors meld for a few more minutes after seasoning adjustments.

Serving Suggestions

As your Pork Estofado reaches its culinary peak, contemplate the various serving options that will complement this delightful dish. Serve it piping hot with steamed white rice, allowing the flavors to intermingle tantalizingly on your plate. Garnish with freshly chopped parsley or spring onions for a vibrant burst of color. This dish is perfect for sharing with loved ones or impressing guests at a dinner party.

Storing and Reheating

If you happen to have leftovers, fear not! Pork Estofado can easily be stored in an airtight container and refrigerated for up to three days. When reheating, place the desired portion in a saucepan over low heat, adding a splash of water if necessary. Allow it to gently warm through while stirring occasionally, being cautious not to overcook the meat.


Congratulations! You have successfully learned how to master the art of cooking Pork Estofado. This classic Filipino dish is sure to become a favorite in your culinary repertoire. With its tender, flavorful pork, savory aromatics, and enticing blend of sweet and tangy flavors, Pork Estofado is the epitome of comfort food. So gather your ingredients, follow the steps outlined in this expert guide, and delve into the world of Filipino cuisine as you savor the complexities of this exquisite dish.


Tuesday, December 19, 2023

From Bitter to Better: Elevate Your Kitchen with Homemade Beef Papaitan


Unraveling the Intensity of Flavors

Prepare your palate for a journey into the robust world of Filipino cuisine with Beef Papaitan. This dish, a concoction of tender beef innards in a tangy and slightly bitter broth, presents a feast of bold flavors that encapsulate the essence of traditional cooking. In this culinary guide, we'll embark on a step-by-step tutorial to master the art of crafting the perfect Beef Papaitan, ensuring a burst of authentic flavors in every spoonful.

The Foundation: Choosing Your Ingredients

Selecting quality ingredients is paramount for an exceptional Beef Papaitan. Start with 1 kg of fresh beef innards, cleaned and prepared for cooking. Ensure the accompanying elements such as 6 cups of water, 2 tbsp of vegetable oil, 1 head of garlic, 1 pc of onion, 2 pcs of ginger, and 2 pcs green finger chili, are gathered for intensity and depth. Key flavor enhancers include 1 package of sinigang original sampalok mix, 1 tbsp of fish sauce, 2 tbsp of brown sugar, and 0.5 tsp of freshly ground pepper.

The Prelude: Preparation Ritual

The initial phase in your culinary quest involves meticulously cleaning the beef innards—a critical step to achieving a cleaner taste. Simmer in boiling water, trimming away any undesirable parts and rinsing thoroughly. This preparatory stage sets the stage for a dish that's free from overpowering gamey flavors.

The Rhythmic Dance: Stirring Up Flavors

Begin by heating vegetable oil in your pot, fusing together finely minced garlic, chopped onions, and julienned ginger. Sauté until fragrant, an essential step that elevates the foundational flavors of your Beef Papaitan.

The Melody: Harmonizing the Ingredients

As the aromatics blend, introduce the prepped beef innards to the pot. The sizzle and sear lock in the flavors, ensuring a juice-laden experience. Cook them to the right note – a perfect balance between tenderness and chewiness.

The Crescendo: Symphony of Spices and Sourness

The art of Papaitan lies in its distinctive broth. Here's where your sinigang mix, a pivotal ingredient, comes into play. Its sourness complements the natural bitterness of the innards, achieved consistently through the addition of 6 cups of water, bringing this symphony to a simmering crescendo.

The Zest: The Citrus Twist

Introduce the juice of 6 pcs calamansi at this juncture for that citrusy zest, a Filipino twist that superbly cuts through the richness of the broth. This citrus addition is not merely an afterthought but an essential chorus to the overall harmony.

The Seasoning: Crafting the Perfect Pitch

Your Beef Papaitan should sing with balanced flavors. Gradually stir in fish sauce, brown sugar, and freshly ground pepper. This concoction doesn't just season your dish; it enhances and fine-tunes, hitting the perfect flavor pitch.

The Heat: The Spicy Undertones

Chilies are instrumental in introducing a subtle, rising heat that crescendos as you dine. Slice and add the green finger chili, adjusting to preferred spice levels. This heat isn't overwhelming but offers a backdrop that heightens the overall taste experience.

The Finale: Completing the Masterpiece

Let the Papaitan simmer until everything harmonizes into a complex yet seamless blend. The flavors need to mellow, mingling together to create a unified taste-profile. This slow simmer is the maestro's final movement, leading the ingredients into a perfect finale.

The Encore: Serving and Savoring

Serve your finely tuned Beef Papaitan hot, ideally with a steaming portion of rice. As every mouthful offers the contrasting textures of innards and the orchestral arrangement of sour, bitter, and umami flavors, remember that the true beauty of this dish lies in its layered complexity.


Sunday, December 17, 2023

Healthy and Nutritious: Cooking Miswa Patola the Right Way

Discover the secrets of cooking the perfect Miswa Patola, a delectable Filipino dish. Learn the steps, tips, and expert techniques to create a sensational culinary masterpiece that will tantalize your taste buds.**

Welcome to the wonderful world of Filipino cuisine, where traditional flavors and vibrant ingredients come together to create masterpieces that satisfy both the soul and the palate. Today, we delve into the realm of Miswa Patola, a dish known for its delicate flavors and nourishing qualities. Join us on this culinary journey as we unlock the secrets to crafting a sublime Miswa Patola dish that will impress even the most discerning taste buds.

Gather Your Ingredients

To begin our Miswa Patola adventure, assemble these essential ingredients:

- 1 tbsp cooking oil
- 1 pc garlic, chopped
- 1 pc onion, chopped
- 1 pc Chicken Cube
- 2 cups water
- 1 bundle misua
- 1 piece patola

Preparing the Ingredients

Before diving into the cooking process, it's important to ensure your ingredients are prepared and ready to go. Take the time to chop your garlic and onion finely, setting them aside for later. Next, peel and slice the patola into thin, half-moon pieces. With the mise en place complete, let's move forward to the next step.

Sautéing the Aromatics

Heat a cooking pot over medium heat, adding a tablespoon of cooking oil to the pot. Once the oil shimmers, add the chopped garlic and onion, sautéing until they become fragrant and slightly golden. The aromatic blend will create a base of flavor that will enhance every mouthful of your Miswa Patola.

At this stage, it's essential to taste the broth and gauge the balance of flavors. If desired, you can adjust the seasoning to suit your personal preference. Some might opt for a touch of salt or a squeeze of calamansi juice to brighten the dish further. Remember, cooking is an art, and your taste buds are the ultimate judges.

Serve and Savor

As the glorious aromas fill your kitchen, it's time to serve your Miswa Patola masterpiece. Ladle the piping-hot broth, complete with misua noodles and patola, into individual bowls. Garnish with freshly chopped spring onions or a sprinkle of crispy garlic for that extra touch of elegance. Accompany it with steamed rice or enjoy it as a comforting, standalone dish. Now, immerse yourself in the taste sensation of Miswa Patola.


Congratulations! You've conquered the art of cooking Miswa Patola. By following these simple steps, you have unlocked the flavors of this renowned Filipino dish, showcasing your culinary prowess. Savor each spoonful of Miswa Patola, reveling in the harmonious blend of misua noodles, tender patola, and fragrant aromatics. Let the symphony of flavors transport you to the vibrant streets of the Philippines, where traditional dishes like Miswa Patola captivate both locals and visitors alike. Bon appétit!


Friday, December 15, 2023

Elevate Your Cooking Game with this Savory Tofu Sisig Recipe

Introduction to Tofu Sisig
Are you ready to elevate your culinary skills with a delectable dish that packs a punch of flavor? Look no further than Tofu Sisig—a vegan twist to the classic Filipino sizzling dish. As an expert in the culinary world, I can assure you that Tofu Sisig is not only a delight for your taste buds, but it's also a versatile and nutritious option for those seeking a plant-based culinary experience. In this comprehensive guide, I will take you through the step-by-step process of creating this mouthwatering Tofu Sisig in the comfort of your own kitchen.

Gathering Ingredients
Before diving into the cooking process, it's crucial to gather all the necessary ingredients for the Tofu Sisig. You will need 45g of canola oil for frying, 500g of tofu cut into small cubes (1/2 inch), 30g of red onion (chopped), 15g of garlic (chopped), 1 piece of bird's eye chili (siling labuyo), 80g of long green chili (siling pangsigang), liquid seasoning (to taste), 45-60g of mayonnaise, and 2 pieces of calamansi. These ingredients are the building blocks of creating a flavorful and satisfying Tofu Sisig that will leave you craving for more.

Preparing the Tofu
To start the cooking process, begin by preparing the tofu for the Sisig. Pat the tofu cubes dry using paper towels to remove excess moisture, which will allow for a crispier texture once fried. Heat the canola oil in a pan over medium heat and carefully add the tofu cubes, ensuring they are evenly spaced to facilitate even frying. Using the active voice, fry the tofu until they achieve a golden brown and crispy texture. The use of canola oil for frying ensures that the tofu is cooked to perfection while enhancing its natural flavors.

Infusing Flavors
Once the tofu reaches the desired golden brown consistency, it's time to infuse it with the bold flavors that define a classic Tofu Sisig. Add the chopped red onion and garlic to the pan, allowing them to caramelize and release their savory essence. The aroma that fills your kitchen at this stage is a testament to the mouthwatering dish that is about to be created. Next, incorporate the bird's eye chili and long green chili, ensuring that the heat level suits your personal preference.

Balancing with Seasoning
The key to a perfectly balanced Tofu Sisig lies in the art of seasoning. Utilize liquid seasoning to tantalize your taste buds with a harmonious blend of savory and umami notes. It is essential to taste as you add the liquid seasoning, ensuring that the flavors are perfectly balanced to suit your individual palate. The active voice is crucial in communicating the hands-on approach required to achieve culinary excellence in every step of the cooking process.

Creamy Finish with Mayonnaise
To impart a luxurious creaminess to the Tofu Sisig, carefully fold in 45-60g of mayonnaise into the sizzling concoction. The addition of mayonnaise not only enhances the richness of the dish but also serves as a binding element to bring all the flavors together. As the mayonnaise integrates with the sizzling tofu, it creates a luscious texture that is both indulgent and satisfying.

The Zesty Finale
Before serving the Tofu Sisig, add a final touch of brightness and tang with the juice of two calamansi. The citrusy notes from the calamansi elevate the dish with a refreshing zing, adding depth and complexity to the overall flavor profile. The active voice emphasizes the action-oriented approach of this culinary step, highlighting the precision needed to achieve a perfectly balanced Tofu Sisig.

The Sizzling Presentation
Now that the Tofu Sisig is ready to be served, it's time to create a sizzling presentation that will captivate both the eyes and the palate. Transfer the sizzling Tofu Sisig onto a hot cast-iron plate, allowing the delightful aroma to fill the air. The sizzling sound is a symphony of flavors that announces the arrival of a culinary masterpiece. This is the moment to showcase your kitchen prowess and culinary artistry.

Serving and Enjoying
As you bring the sizzling Tofu Sisig to the table, watch as the steam rises and the delectable aroma entices the senses. Whether served as an appetizer, main course, or part of a shared meal, the Tofu Sisig is a versatile dish that caters to various dining experiences. Garnish the dish with fresh herbs or additional chili for an extra kick to match your preference. Encourage your guests to savor each bite and relish in the robust and complex flavors you've masterfully brought together.


In conclusion, mastering the art of cooking Tofu Sisig is an immensely rewarding endeavor. By using the freshest ingredients, infusing bold flavors, and incorporating precise techniques, you can create a Tofu Sisig that rivals even the most authentic meat-based versions. The transition words throughout this guide have helped to illustrate the seamless flow of creating this savory dish, ensuring that you are equipped with the knowledge and confidence to embark on your Tofu Sisig culinary journey.

Elevate your culinary skills with this expert guide to cooking Tofu Sisig. Learn to infuse bold flavors, balance seasoning, and present a sizzling masterpiece that caters to various dining experiences.

Wednesday, December 13, 2023

The Art of Cooking Ginisang Munggo with Hibe: A Delicious and Nutritious Filipino Dish

Introduction:

Ginisang Munggo with Hibe, also known as Sauteed Mung Beans with Dried Shrimps, is a popular Filipino dish packed with flavors and nutrients. It's a hearty and satisfying meal that is both easy to prepare and budget-friendly. In this blog post, we will delve into the art of cooking Ginisang Munggo with Hibe, step by step. From selecting the freshest ingredients to mastering the cooking process, you'll soon become an expert in recreating this traditional Filipino favorite. So let's put on our aprons and embark on a culinary journey!

Ingredients and Equipment

To create a delectable pot of Ginisang Munggo with Hibe, it's essential to have the right ingredients and equipment at hand. Here's what you'll need:

Ingredients:
- 1 cup Munggo (Mung Beans)
- 5 cups Water
- 0.25 cup Vegetable Oil
- 6 cloves Garlic, minced
- 1 pc Onion, chopped
- 2 pcs Cherry Tomato, halved
- 0.15 cup Shrimp, dried and deveined
- 0.25 cup Malunggay (Moringa) leaves, optional but highly recommended

Equipment:
- Large cooking pot
- Wooden spoon or spatula
- Cutting board
- Knife

Preparation and Cooking

Cleaning and Soaking the Mung Beans:
Begin by thoroughly rinsing the mung beans under running water. Remove any impurities or stones. Then, place the cleaned beans in a bowl and cover them with water. Soak the beans for at least four hours or overnight to soften them.

Sautéing the Aromatics:
In a large cooking pot, heat the vegetable oil over medium heat. Add the minced garlic and chopped onion, and sauté until they turn translucent and release a fragrant aroma. This process typically takes about two to three minutes.

Adding the Shrimp and Tomatoes:
Next, add the dried shrimp to the pot and sauté for another two minutes until they become slightly crispy. Then, add the halved cherry tomatoes and continue sautéing until they start to soften and release their juices.

Cooking the Mung Beans:
Drain the soaked mung beans and add them to the pot, along with five cups of water. Bring the mixture to a boil, then reduce the heat to low. Let it simmer, partially covered, for about 45 minutes to an hour, or until the beans become tender and the broth thickens.

Adjusting the Consistency and Seasoning:
If desired, you can use the back of the spoon to partially mash some of the mung beans, creating a thicker and creamier consistency. Season with salt and pepper according to your taste preferences, stirring well to ensure the flavors are evenly distributed.

Adding the Malunggay Leaves:
At this point, you can choose to enhance the nutritional value of your dish by adding fresh malunggay leaves. Stir in the leaves and let them cook for an additional two minutes until they wilt.

Serving and Garnishing

Once your Ginisang Munggo with Hibe is ready, it's time to plate up and add some vibrant garnishes. Here are a few suggestions to elevate the visual appeal and flavor profile of your dish:

Ladle the hot Ginisang Munggo into individual bowls or onto serving plates.
Garnish with a drizzle of vegetable oil and a sprinkle of freshly chopped spring onions.
For an extra kick of umami, add a few drops of fish sauce or soy sauce to each serving.
Serve hot with a side of steamed rice and enjoy!

Health Benefits of Ginisang Munggo with Hibe

Apart from its delicious taste, Ginisang Munggo with Hibe offers a host of health benefits. Here are a few reasons to include this dish in your regular meal rotation:

High in fiber: Mung beans are an excellent source of dietary fiber, aiding digestion and promoting a healthy gut.
Rich in protein: Mung beans are a plant-based protein powerhouse, making this dish a great option for vegetarians and vegans.
Packed with vitamins and minerals: Mung beans are loaded with essential nutrients like iron, magnesium, folate, and vitamin B6.
Supports heart health: The soluble fiber in mung beans can help lower cholesterol levels, reducing the risk of heart disease.
Ideal for weight management: Mung beans are low in calories and high in fiber, promoting satiety and aiding weight loss.

Tips for Cooking Success

To ensure your Ginisang Munggo with Hibe turns out perfect every time, here are a few expert tips to keep in mind:

Choosing the best mung beans: Look for mung beans that are uniform in size, uncracked, and have a bright green color.
Soaking for the perfect texture: Soaking the mung beans overnight will help reduce the cooking time and result in a smoother texture.
Variations and additions: Experiment with different vegetables like squash or bitter melon to add variety to your dish.
Make it creamier: If you prefer a creamier consistency, add a dollop of coconut milk or evaporated milk towards the end of cooking.
Leftover makeover: Ginisang Munggo with Hibe tastes even better the next day. Store any leftovers in an airtight container in the refrigerator overnight, and reheat gently before serving.


In conclusion, mastering the art of cooking Ginisang Munggo with Hibe is a fulfilling journey that will reward you with a delicious and nutritious Filipino dish. From the first step of selecting the freshest ingredients to serving the final masterpiece, this culinary adventure is sure to become a favorite in your household. So gather your cooking tools, follow the instructions diligently, and enjoy the satisfying flavors of this traditional Filipino comfort food.


Tuesday, December 12, 2023

Savor the Flavors: Cooking Tips for a Mouthwatering Skillet Steak with Peppers & Onions


Introduction
Welcome to the world of culinary expertise! In this comprehensive guide, we will take you through the step-by-step process of preparing a mouthwatering dish: Skillet Steak, Peppers & Onions. This delicious recipe combines the bold flavors of perfectly seared steak with the sweetness of sautéed peppers and onions. With just a handful of ingredients, you'll be able to create a sensational dish that will impress your family and friends.

Gathering the Ingredients
Before we dive into the cooking process, let's make sure we have all the necessary ingredients at hand. For this recipe, you will need:

- 2 Tbsp. olive oil, divided
- 1 lb. boneless sirloin steak
- 1 Tbsp. Beef flavor Bouillon
- 1 green bell pepper or red bell pepper
- 1 yellow onion
- 1 large clove garlic

Preparing the Steak
To ensure a tender and flavorful steak, it's essential to properly prepare it before cooking. Start by seasoning the steak generously with salt and pepper on both sides. This will enhance the natural flavors of the meat. Allow the steak to sit at room temperature for about 15 minutes, which will help it cook more evenly.

Next, heat a tablespoon of olive oil in a skillet over medium-high heat. Add the seasoned steak to the hot skillet and let it sear for approximately 3-4 minutes on each side, or until it reaches your desired level of doneness. For a medium-rare steak, aim for an internal temperature of around 130°F (54°C) using a meat thermometer.

Sautéing the Peppers & Onions
While the steak rests, we can turn our attention to the peppers and onions. Slice the bell pepper and yellow onion into thin strips, and mince the garlic clove.

In the same skillet used to cook the steak, add another tablespoon of olive oil and heat it over medium heat. Toss in the sliced peppers and onions, along with the minced garlic. Sauté them for about 5-6 minutes, or until the vegetables become tender and slightly caramelized.

Combining the Flavors
Once the peppers and onions are cooked to perfection, return the steak to the skillet and nestle it amongst the colorful sautéed vegetables. Sprinkle the Beef flavor Bouillon over the entire dish, allowing the flavors to meld together.

Cover the skillet with a lid and reduce the heat to low. Allow the dish to simmer for an additional 3-4 minutes, giving the flavors a chance to further infuse into the steak and vegetables.

Removing and Slicing the Steak
Using tongs, carefully remove the cooked steak from the skillet and transfer it to a cutting board. Allow the steak to rest for a few minutes, which will help to redistribute the juices and ensure a tender final result.

After the resting period, slice the steak against the grain into thin strips. This cutting technique will result in a more tender and enjoyable eating experience. Arrange the sliced steak on a platter, and then carefully spoon the peppers and onions over the top.

Serving Suggestions
Skillet Steak, Peppers & Onions can be enjoyed in various ways. For a hearty meal, serve it alongside a bed of fluffy mashed potatoes or buttered egg noodles. Alternatively, you can use the meat and vegetable mixture as a filling for warm tortillas, creating scrumptious steak fajitas.

 Pairing with the Perfect Beverage
To complement the robust flavors of the dish, consider pairing it with a rich red wine such as Cabernet Sauvignon or Malbec. If wine isn't your preference, a cold beer, whether a hoppy IPA or a refreshing lager, can be an excellent choice. For non-alcoholic options, try a sparkling grape juice or a citrus-infused iced tea.

Tips for Success
- Make sure your skillet is properly heated before adding the steak for a beautiful sear.
- Allow the steak to rest before slicing to retain its juices.
- Experiment with different types of bell peppers for added flavor and color variety.
- For a little extra kick, sprinkle some red pepper flakes over the dish before serving.
- Customize the dish by adding mushrooms, zucchini, or other vegetables of your choice.


Congratulations! You have now successfully mastered the art of cooking Skillet Steak, Peppers & Onions. This versatile dish is perfect for a weeknight dinner or a special occasion, impressing your loved ones with its delectable flavors and enticing aroma. So, go ahead, grab your skillet, and show off your culinary skills with this irresistible recipe!


Sunday, December 10, 2023

From Pantry to Plate: Crafting the Perfect Chicken Afritada


Chicken Afritada is a hearty Filipino stew that is as soul-warming as it is delicious. Today, we're venturing through the steps to concoct this vibrant and flavor-soaked dish.

Prelude to Poultry Perfection
Embarking on our culinary quest, it's crucial to understand that Afritada is all about balance. The interplay of vegetables, chicken, and a rich tomato base creates a symphony of taste that speaks to the heart of Filipino cuisine.

A Symphony of Spices and Aromatics
Start by prepping fresh produce. Mince the garlic cloves finely and chop the onion. The garlic and onion will build our foundational flavor, which complements the chicken's richness.

The Chicken: Choosing and Preparing
For our central ingredient, we need 0.5 kg of chicken. Quality matters, so select chicken pieces with a good balance of meat and bone for flavor. Cut it into serving pieces for easier cooking.

Vegetables: The Spectrum of Nutrients
Dice the potato and carrots into substantial pieces that will stand up to simmering. These veggies are not just fillers; they're nutrient powerhouses that add texture and taste to the dish.

Painting with Peppers
The red and green bell peppers are more than a color pop. Sliced into strips, they will add sweetness and a slightly smoky flavor to the stew. These peppers also retain some of their crispness, offering a lovely textural contrast.

The Flavor Concentrate: Chicken Broth Cubes and Bay Leaves
As for the chicken broth cubes and bay leaves, they are your secret weapons. They amplify the chicken's natural flavors and infuse the stew with a depth that water alone can't achieve.

A Tantalizing Tomato Tapestry
Pour in the cup of tomato sauce, which gives the Afritada its signature robustness. The acidity of the tomatoes cuts through the richness, creating a well-rounded sauce.

Sautéing: The Fragrant Alchemy
Heat the 0.25 cup of vegetable oil in a sizeable pot. Add the garlic and onion, stirring until they're golden and fragrant. This step is crucial—it’s the aromatic base that sets the stage for the entire dish.

The Chicken’s Transformation
Now, introduce the chicken to the pot. Brown the pieces evenly for a deeper flavor. As the chicken cooks, it'll release its juices, becoming the dish's heart.

Unveiling the Stew’s Essence
It’s time for our liquid ingredients. Begin with the chicken broth cubes dissolved in a cup of water, followed by the cup of tomato sauce. This mixture will envelop the chicken in a velvety sauce as it simmers.

Into the Pot: Vegetables Meet the Broth
Add the potato, carrots, and bay leaves into the mix. Season with 0.5 tsp of ground pepper and 2 tbsp of brown sugar, which balance the tomato's tartness. 

The Simmering Crescendo
Cover and let it simmer, allowing the flavors to meld. After some minutes, when the potatoes are tender, introduce the bell peppers and cherry tomatoes for a fresh twist.

The Flavorful Finale
Ending on a high note, the Chicken Afritada is now a rich tapestry of flavors and colors. Taste and adjust the seasoning if needed. Your kitchen is now perfumed with the scent of a meal that promises comfort.

---

Dive into the vibrant world of Filipino cuisine with our expert guide to cooking Chicken Afritada. From the aromatic base to the rich tomato stew, learn how to blend chicken, veggies, and spices into the perfect comfort food.


Friday, December 8, 2023

The Ultimate Guide to Mastering the Art of Cooking Lechon Belly


Introduction

Cooking a perfect lechon belly is a culinary feat that requires patience, skill, and attention to detail. This beloved Filipino dish is known for its rich flavors, crispy skin, and melt-in-your-mouth tenderness. Whether you're a seasoned chef or a home cook looking to impress your guests, mastering the art of cooking lechon belly will undoubtedly elevate your culinary repertoire.

In this comprehensive guide, we will delve into the intricacies of preparing and cooking lechon belly, from selecting the finest pork belly to crafting the perfect marinade and achieving that coveted crispy skin. With the right techniques and a touch of finesse, you'll be well on your way to creating a lechon belly masterpiece that will leave your family and friends craving for more.

Selecting the Perfect Cut of Pork Belly

Before embarking on your lechon belly journey, it's crucial to start with the best-quality pork belly. Opt for a piece that is well-marbled with a good balance of lean meat and fat. Aim for a 1.5 kg pork belly, ensuring that it is fresh and free from any off-putting odors.

When selecting the pork belly, look for an even thickness throughout the cut to ensure uniform cooking. A uniform thickness is key to achieving a perfectly cooked lechon belly with a tender, juicy interior and crispy, golden-brown skin.

Preparing the Marinade 

The key to an exceptional lechon belly lies in the marinade. A well-balanced combination of flavors is essential for infusing the pork belly with irresistible taste. To create the perfect marinade, combine the following ingredients:

- 0.5 tsp ground pepper
- 1 pc onion, finely chopped
- 2 heads garlic, minced
- 4 stalks scallion, chopped
- 2 stalks lemongrass, finely chopped
- 0.25 cup oyster sauce
- 2 tbsp spiced vinegar
- 0.5 cup spiced vinegar
- 3 tbsp soy sauce
- 3 cloves garlic, minced
- 2 pcs onion, finely chopped
- 1 pc hot chili pepper, chopped
- 0.5 tsp ground pepper
- 2 tbsp brown sugar

Combine all the ingredients in a bowl, ensuring that the flavors are well incorporated. The aromatic blend of garlic, onion, scallion, and lemongrass will infuse the pork belly with a tantalizing aroma, while the oyster sauce, soy sauce, and vinegar will impart a depth of flavor and tenderness to the meat. Adjust the seasonings to suit your personal taste, and don't be afraid to experiment with the ratios to create a marinade that truly captivates your palate.

Preparing the Pork Belly

Once you've crafted the perfect marinade, it's time to prepare the pork belly. Start by scoring the skin of the pork belly in a crisscross pattern, being careful not to cut too deeply into the meat. This will help the skin crisp up during the cooking process, creating that irresistible crackling texture that defines a spectacular lechon belly.

Next, generously rub the marinade all over the pork belly, ensuring that it penetrates into the scores on the skin as well as the meat itself. For best results, allow the pork belly to marinate in the refrigerator for at least 12 hours, or preferably overnight, to allow the flavors to fully permeate the meat, resulting in an incredibly flavorful and succulent dish.

Mastering the Roasting Process

Roasting the marinated pork belly to perfection is a critical step in achieving that signature crispy skin and tender meat. Preheat your oven to 180°C (355°F) and place the marinated pork belly on a wire rack in a roasting pan to allow the heat to circulate evenly around the meat.

As the pork belly roasts, periodically baste it with the remaining marinade to ensure that it remains moist and flavorful throughout the cooking process. Keep a close eye on the pork belly as it cooks, and use a meat thermometer to monitor the internal temperature, aiming for 65-70°C (150-160°F) for a perfect balance of tenderness and succulence.

Achieving Crispy Perfection

To elevate your lechon belly to new heights, the final step is achieving the irresistible crispy skin that defines this iconic dish. Increase the oven temperature to 230°C (450°F) or turn on the broiler function during the last 20-30 minutes of cooking to attain that coveted golden-brown, crackling skin.

As the pork belly nears completion, pay close attention to prevent the skin from burning. Rotate the pork belly if necessary to ensure even crisping, and continue basting with the pan juices to infuse the skin with rich, caramelized flavor. Once the skin reaches a crispy, golden-brown perfection, remove the lechon belly from the oven and allow it to rest for a few minutes before carving.

Slicing and Serving the Lechon Belly

Slicing the lechon belly is an art form in itself. Use a sharp knife to carve the pork belly into thin, succulent slices, ensuring that each portion contains a delectable combination of crispy skin and tender meat. The contrast in textures is what makes lechon belly such a sought-after delicacy, so take your time to carve the meat with precision and finesse.

Serve the lechon belly on a platter garnished with fresh herbs, such as cilantro or parsley, and accompany it with a traditional spiced vinegar dipping sauce for a burst of tangy, savory flavor. Whether you're serving it as the centerpiece of a festive celebration or as a mouthwatering weeknight dinner, your perfectly cooked lechon belly is sure to impress the most discerning palates.

Tips for Flavor Variations

While the traditional lechon belly recipe is a time-tested classic, don't be afraid to experiment with flavor variations to suit your personal preferences. Consider incorporating aromatic spices such as star anise, cinnamon, or cloves into the marinade for a warm, exotic twist. You can also infuse the pork belly with citrus notes by adding fresh calamansi or lime juice to the marinade for a refreshing burst of acidity.

For those who enjoy a touch of heat, finely mince extra hot chili peppers and incorporate them into the marinade to impart a fiery kick to the lechon belly. The beauty of cooking is that it allows for endless creativity, so feel free to explore different flavor profiles and ingredients to create a lechon belly that reflects your unique culinary vision.

Storing Leftover Lechon Belly

If, by some miracle, you find yourself with leftover lechon belly, fear not—this delectable dish can be easily stored for future enjoyment. To preserve the succulence and crispiness of the lechon belly, transfer any remaining portions to an airtight container and refrigerate promptly. When reheating, place the slices on a baking sheet and warm them in a preheated oven until the skin becomes irresistibly crispy once again.

Additionally, leftover lechon belly can be repurposed into a myriad of mouthwatering dishes, from flavorful stir-fries to indulgent sandwiches and hearty soups. Embrace your culinary creativity and transform your leftover lechon belly into an array of delectable meals that will delight your taste buds time and time again.

Sharing the Lechon Belly Experience

Cooking lechon belly is not merely a culinary endeavor; it's an opportunity to bring people together and create lasting memories. Whether you're preparing this iconic dish for a special occasion, a family gathering, or simply as a labor of love, the act of serving lechon belly embodies the warmth and hospitality of Filipino cuisine. Share the joy of savoring this beloved delicacy with your loved ones, and revel in the delight it brings to all who partake in the experience.

Embracing the Art of Cooking Lechon Belly

In conclusion, mastering the art of cooking lechon belly is a rewarding journey that allows you to hone your skills as a culinary artisan. From the careful selection of pork belly to the meticulous preparation of the marinade and the precise execution of the roasting process, each step in creating lechon belly is an opportunity to showcase your expertise and passion for cooking.

By applying the expert tips and techniques outlined in this comprehensive guide, you can elevate your lechon belly game and impress even the most discerning food enthusiasts. Embrace the art of cooking lechon belly with confidence and enthusiasm, and savor the satisfaction of creating a dish that captivates the senses and brings people together in celebration of exceptional food and shared experiences.

In closing, the journey to mastering the art of cooking lechon belly is an enriching pursuit that allows you to delve into the rich tapestry of Filipino cuisine and create culinary masterpieces that captivate the palate and nourish the soul. So gather your ingredients, don your culinary apron, and embark on a gastronomic adventure that will surely leave a lasting impression on all who have the privilege of savoring your delectable lechon belly creation.

Learn the expert tips and techniques for preparing a mouthwatering lechon belly. From selecting the perfect cut of pork belly to mastering the marinade, this comprehensive guide will take your lechon belly game to a whole new level.

Thursday, December 7, 2023

Mastery Unleashed: The Art of Crafting Perfect Chicken Mami


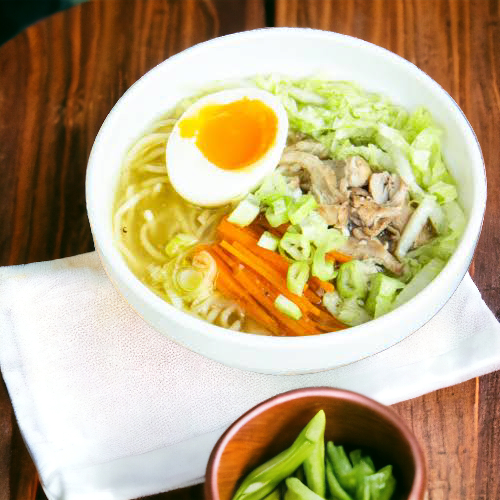
Dive into the world of culinary excellence as we explore the intricate recipe for cooking the most delectable chicken mami. From selecting the finest ingredients to enhancing flavors, this comprehensive guide will unveil the secrets to creating an authentic and soul-satisfying bowl of chicken mami. Prepare to embark on a culinary journey like no other.

Introduction: The Allure of Chicken Mami

Chicken mami, a classic Filipino comfort dish, is the perfect embodiment of warmth and hearty flavors. This beloved bowl of goodness combines tender chicken, springy egg noodles, and an array of delectable ingredients to create a culinary masterpiece. Embark on a gastronomic adventure as we unlock the secrets to preparing an exquisite bowl of chicken mami that will leave your taste buds begging for more.

Selecting the Finest Ingredients

To create a truly exceptional chicken mami, quality ingredients are paramount. Let's begin by carefully handpicking the following essentials:

Chicken Breast: Choose 100g of fresh, boneless chicken breast, preferably organic to ensure tenderness and superior flavor.

Water: 5 cups of pure, clean water will serve as the base for your savory broth.

Preparing the Foundation - The Broth

A delectable chicken mami starts with a robust and flavorful broth. Follow these steps to perfect this crucial component:

Begin by bringing the water to a gentle boil in a large pot. Add the chicken breast and simmer over low heat for 30 minutes, allowing the flavors to infuse harmoniously. Skim off any impurities or foam that may rise to the surface.

Next, remove the chicken breast from the pot and set it aside to cool. Once cooled, shred the chicken into small, bite-sized pieces. This succulent chicken will later be added to the finished chicken mami.

Elevating the Noodle Experience

The noodles in chicken mami are a key element, providing texture and satisfaction with each spoonful. Here's how to prepare the noodles to perfection:

Egg Noodles: Boil 2 cups of egg noodles in a separate pot until they are al dente, following the package instructions. Drain and rinse them under cold water to halt the cooking process.

Baby Carrots: Slice the baby carrots into thin rounds and set them aside for garnish.

Essential Additions - Veggies and Aromatics

To truly elevate the flavors of your chicken mami, a medley of fresh and aromatic ingredients must be incorporated:

Pechay Baguio: Slice the pechay baguio into bite-sized pieces, ensuring to discard the tough stems.

Onion Springs: Finely chop 1 teaspoon of onion springs for a burst of freshness and mild onion flavor.

The Art of Garnishing

Garnishing is not just visually appealing; it adds an extra layer of depth to the dish. Elevate your chicken mami with the following garnishes:

Hard-Boiled Eggs: Peel and slice 2 hard-boiled eggs into halves or quarters for a rich and creamy touch.

Toasted Garlic: Heat 2 tablespoons of garlic in a pan until golden brown and crispy. These delectable garlic bits will add a delightful crunch and aroma to your chicken mami.

Assembling the Perfect Bowl of Chicken Mami

Now that all the components are ready, it's time to assemble your masterpiece. Follow these steps to create a stunning bowl of chicken mami:

In a deep soup bowl, ladle the homemade chicken broth, ensuring it is piping hot.

Add a portion of the cooked egg noodles, creating a bed for the other ingredients.


Place the shredded chicken, pechay baguio, and baby carrots on top of the noodles.

Garnish with the hard-boiled eggs and sprinkle the toasted garlic and onion springs.

Serving Suggestions for Ultimate Pleasure

To fully savor the flavors of your chicken mami, consider the following serving suggestions:

Calamansi: For a tangy kick, squeeze a fresh calamansi over your chicken mami just before indulging. The vibrant citrus notes will uplift the dish.

Soy Sauce and Fish Sauce: Customize the taste to your preference by adding a dash of soy sauce and fish sauce. These condiments enhance the umami flavors and provide an extra layer of depth.

Variations and Adaptations

The beauty of chicken mami lies in its versatility; it can be adapted to suit various preferences and dietary needs. Consider these variations:

Vegetarian Chicken Mami: Substitute the chicken breast with plant-based alternatives such as tofu or tempeh for a satisfying vegetarian version.

Spicy Chicken Mami: Add a touch of heat by incorporating diced chili peppers or a sprinkle of chili flakes for those who enjoy a fiery kick.

Storing and Reheating

If you find yourself with leftovers or simply wish to prepare chicken mami in advance, proper storage and reheating will ensure the dish remains deliciously satisfying:

Allow the chicken mami to cool to room temperature before transferring it to an airtight container. Refrigerate for up to three days. When reheating, place the desired portion in a pot and heat gently until piping hot. Be sure to adjust seasoning if needed.

A Taste of Blissful Satisfaction

Preparing chicken mami is not just about following a recipe. It is about creating a dish that resonates with warmth, love, and satisfaction. Indulging in a bowl of meticulously crafted chicken mami is an experience that nourishes both the body and the soul.

In conclusion, mastering the art of cooking chicken mami is a rewarding journey that requires attention to detail and a passion for flavors. With each carefully selected ingredient and thoughtfully executed step, you are one step closer to creating an extraordinary bowl of chicken mami that will leave your loved ones asking for seconds. So, roll up those sleeves, gather your ingredients, and embark on a culinary adventure that promises unforgettable delights.