Monday, July 3, 2023

Savor the Exotic: Unleash Your Inner Chef with a Beef Papaitan Spectacular!


Dive into the exotic Filipino cuisine with our step-by-step guide on how to cook delicious Beef Papaitan! An exquisite blend of beef innards, sampalok, garlic, and brown sugar, it’s the gastronomic adventure of a lifetime!

1. A Hearty Introduction to the Unorthodox

Hello food explorers! Life’s too short for same-ol'-same-ol' grub, right? Buckle up, chums, because today we’re veering off the beaten culinary path and heading straight into exotic territory with a delectable Filipino gem - Beef Papaitan. Now, don't let the unfamiliar terrify you. Instead, strap on that kitchen apron, grab your ladle, and let’s go on a culinary adventure!

You may be wondering, "What on earth is Beef Papaitan?" Well folks, it's a savory and slightly bitter stew, full of rich flavors, prepared with, wait for it....beef innards! Yep! You read it right. The vibrant, often overlooked innards provide a unique taste explosion that'll ripple through your taste buds. Can you handle it? Let's find out!

2. The Juicy Anatomy of Our Recipe

For our version of Beef Papaitan, we're gonna work with: 

* 1 kg. Beef innards,
* 6 cups Water,
* 2 tbsp. Vegetable Oil,
* 1 head Garlic,
* 1 pc. Onion,
* 2 pcs. Ginger,
* 2 pcs. Green Finger Chili,
* 1 package Sampalok Mix,
* 1 tbsp. Fish Sauce,
* 2 tbsp. Brown Sugar,
* 0.5 tsp. freshly ground pepper,
* 6 pcs. Calamansi.

This may look quite a list, but hey, making Beef Papaitan is a labor of love, and the end result? Absolutely worth it!

3. The Great Inwards Adventure

First off, let's tackle the beef innards. We’ve got a kilogram of all that good stuff! Make sure it's fresh and well cleaned - this is crucial for a flavourful Papaitan. 

Treat your innards nicely, give them a proper rinse, and then it's showtime! Put them in a large pot, pour in six cups of water, and let’s get this party boiling! Simmer until the meat is tender, which typically takes an hour or so.

4. The Onion and Garlic Love Affair

While your pot’s boiling, chop your onion and garlic. You don't need a romantic candle-light setting, but trust me, nothing screams love like the aromatic fusion of garlic and onion sautéing in sizzling vegetable oil. Just don't forget to stir occasionally, we don't want any burnt offerings!

5. The Ginger and Chili Chick Flick

Every movie needs a subplot, right? Enter the super-duo, ginger and green finger chili. Peel them, slice 'em thin, and toss them into the same pan. They'll add a kick that'll make your Papaitan both hot and heart-warming!

6. The Sampalok Mix and Fish Sauce Tango

Unwrap your sampalok mix (that's your sour secret weapon), and add it into our simmering pot of innards. Then, give your fish sauce — that quintessential Filipino ingredient, a warm invitation to the dance floor, as it pirouettes into the simmering mix.

7. The Sweetening Up with Brown Sugar

Let's balance the bitterness with something sweet, and that's where brown sugar comes in. It’s not just about sweetening; it also enhances all other flavors in the pot. It's like a wing-man for your other ingredients, raising their game by just being there.

8. Freshly Ground Pepper and Calamansi Finale

Last but not least, our finishing touches. Sprinkle freshly ground pepper and squeeze in those juicy calamansi (Filipino lemons). A dash of pepper adds depth, while the calamansi zest brightens up everything.

9. The Long Awaited Unveiling

Serve your Beef Papaitan piping hot, preferably with steamed white rice. And there you have it, comrades, a one-way ticket to food paradise!

10. The Celebratory Send-off

Congratulations on successfully cooking up this tasty, traditional Filipino stew! Now it's time to scoop up a spoonful, close your eyes, and savor the explosion of flavors. Once you've tried this, the exotic will never feel strange again!

Sunday, July 2, 2023

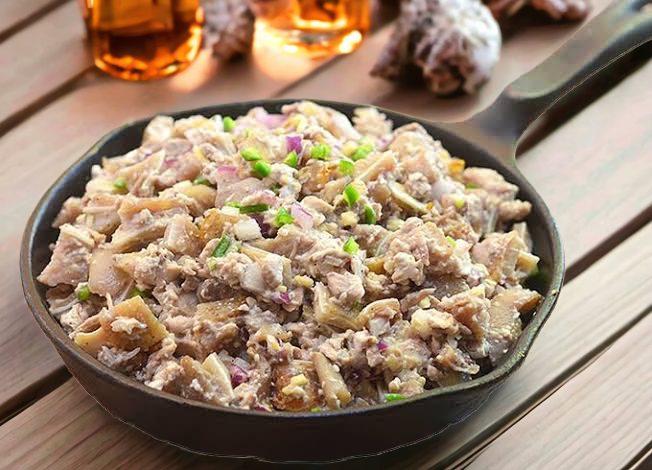
Demystifying Dinakdakan: Simple Steps to Cook this Filipino Favorite

Explore the bold flavors of Filipino cuisine with our step-by-step guide to making Dinakdakan. This guide takes you on a journey from choosing the perfect pork cheek and brain to creating a flavor-packed concoction with an array of zesty spices. Learn the secret to this tangy delicacy and bring a taste of the Philippines into your kitchen. Get ready to surprise your friends and family with this culinary masterpiece!


Introduction: All Aboard the Flavor Train 
Hey there, foodie friends! Today, we're embarking on a culinary expedition, a little detour to the scenic lands of the Philippines. Now, if you're a fan of lip-smacking, heart-warming dishes, you absolutely MUST try Dinakdakan, a dish that dances on your taste buds tantalizingly. A delightfully tangy blend of pork cheek, brain, an array of spices, and a zesty citrus juiciness make it an iconic part of the Filipino culinary landscape. So, put on your apron and let our taste-fueled journey commence.

The Down-Home Heritage of Dinakdakan
Descendant of the Igorot tribe's traditional cooking, Dinakdakan is more than just a dish - it’s a tribute to a rich, vibrant culture. Its name, heartily derived from the word 'dakdakan', signifies 'to chop into small pieces', an exciting hint of the flavor-packed adventure that awaits you in every bite.

Tick-Tocking Ingredients Unveiled
Before our hands get dirty, let's gather our culinary toolkit. From the star of the show, 1 kg of hearty Pork Cheek, to 100 g of texture-adding fresh Pork Brain, all the way to our exciting support cast including Vegetable Oil, punchy Peppercorns, lovely Red Onions, spicy Ginger, a delightful duo of Red and Green Chilies, zesty Calamansi Juice, classic Vinegar, and trusty Soy Sauce, we've got all we need to put up a show in the kitchen!

A Prepping Prelude
Alright, foodie battlers, time to roll up those sleeves! First things first, we're giving our pork cheek and brain a good, thorough wash, then setting them aside to hang out with a pot of boiling water and your aromatic peppercorns. Savor the sights and smells of this delightful duo dancing in the golden broth in a joyous bathing ritual. 

The Boiling Ballet
Once our protein pals are perfectly tender, we kick up the flavor by tossing in fine-chopped red onions and ginger, their aromas kicking up a glorious symphony in your saucepan. The pork bits would bask in this flavor jacuzzi, absorbing all your patience and care in the form of jaw-dropping flavors.

The Chilling Chapter
Time for a little breather now as we switch gears and give our dish a little cold love. Post the boiling extravaganza, we're tossing our pork pieces in the freezer for a quick spell. This step is the secret to a beautiful texture that will make your Dinakdakan the talk of the town!

The Frying Fiesta
Now that our pork pieces have had their chill sesh, bring out your pan and rev up that vegetable oil. Get ready for the beautiful sizzle as we introduce the pork to its hot oil bath. Keep flipping them till they transform into beautiful, golden studs of meaty goodness.

The Exhilarating Assembly
Once our pork parts are crispy divine, we gather our chilies, calamansi juice, red and green chili, vinegar, soy sauce, and get ready for the musical medley assembly. Toss these all together, ensuring they are mixed well and you can see the ingredients turning into a vibrant panorama of flavors. 

The Flavor-filled Finale
Just when you thought we were done, we're throwing in a surprise encore. Take the preparation and let it bask in the beautiful concoction of spices and flavors for a good 15 minutes. The result, my friends, will be nothing less than a rock concert of Filipino flavors in every bite of your Dinakdakan.

A Dinakdakan Devotee’s Delight
So fellow food fanatics, that's how we take a humble assortment of ingredients and create a culinary spectacle called Dinakdakan. It's a journey as much about flavors as it is about cultural appreciation and culinary creativity. So set that table, invite your friends and let them have a taste of your labor of love in the form of divine Dinakdakan.

Ingredients:

1   kg. Pork Cheek
100   g. Pork, fresh, variety meats and by-products, brain, raw
2   tbsp. Vegetable Oil,
0.25   tsp. Peppercorn,
2   pcs. Red Onion,
6   tsp. Ginger,
1   pc. Green Finger Chili,
2   pcs. Red And Green Chili,
4   pcs. Calamansi Juice,
2   tbsp. Vinegar
2 tbsp. soy sauce

Bihon Guisado Bonanza: A Journey into the Heart of Filipino Cuisine


Jump aboard our Filipino culinary roller coaster, as we dive into cooking the classic Bihon Guisado! Quick, easy, and packed with flavors, this guide is your ticket to a hearty homemade Filipino meal!

1. The Journey Begins: The Philippines On Your Plate
Hello there, food adventurists! Are you ready to delve into the vibrant, flavorful world of Filipino cuisine? Awesome! Let's put on our aprons and make one Filipino dish that's set to tickle your taste buds - Bihon Guisado! Before you shrug off this thrilling culinary experience, let's clear the air - 'Bihon Guisado' isn't as hard to pronounce as it is to resist. It’s simply stir-fried rice vermicelli, loaded up with veggies, meats, and packed with tons of flavor!

2. The Secret Ingredient: Our Shopping List Unveiled
For this tantalizing dish, there are a few ingredients you need to have on hand. Let’s start with “1 pack (105 grams) Pansit bihon”, very thin rice noodles and the backbone of this mouth-watering meal. You'll also need “1 tablespoon (15ml) Cooking oil”, “1/4 cup (35 grams) Onion, sliced”, and “2 tablespoons (24 grams) Garlic- minced”. Remember folks, garlic is never optional in a Filipino kitchen!

3. Power-Up With The Veggies: A Crunchy Affair
For some added crunch, get ready with “1 cup (100 grams) Chayote (Sayote), sliced” and “1 cup (50 grams) Cabbage - sliced”. These veggies not only bring a wonderful texture to the dish but provide a healthy twist as well. Believe me, you won't even realize you're loading up on greens! And oh, before you ask, Chayote is a mild-flavored veggie also known as vegetable pear or mirliton.

4. Fluid Matters: An Unexpected Twist 
Next up, we're gonna add some wet stuff. We need “2 cups (500 ml) Water” and “2 teaspoons (10ml) Soy sauce”. Why water, you ask? We've all got it, it’s healthy, and it helps soften up the noodles pretty well! And the soy sauce? Ah, it not only gives our dish a bit of color, but also loads it with flavor!

5. Taste Bud Fireworks: The Power of Seasoning 
Last but certainly not least, we need “1 pack (8 grams) ALL-IN-ONE SEASONING MIX”. Filipino cuisine can’t stand on just two legs. Onions and garlic, meet Salt & Pepper's Filipino cousin, the All-In-One Seasoning Mix. This guy will give you an explosion of flavor, so don't fear to add that extra bit.

6. Gather and Prep: Round Up Your Troops 
Now that we have all our ingredients ready, start prepping your veggies. Slice your onions and garlic, and chop your Chayote and Cabbage. Gather the rest of your ingredients, take a sip of that drink you've got by your side, and take a deep breath. We're about to dive into the cooking process, dear food lovers!

7. The Main Event: Sauté and Sear
Alrighty then! Heat your oil in a pan and stir fry those minced garlic and sliced onions until you’re greeted with the fragrant aroma of these two staples. This is the foundation of our Bihon Guisado - convincing your neighbors that, hey, something delicious is happening in here!

8. Veggie Madness: Bring The Crunch
After you've given your neighbors a fair reason to be jealous, add your sliced Sayote and Cabbage to the pan. Give them a minute or two to mingle with the onions and garlic. Just when they start to sweat, that's your cue to move on to the next step!

9. Noodle Nirvana: Welcome Bihon!
Add in the water and let it bubble away before introducing your pack of Pansit bihon into the mix. Let’s give them some alone time, shall we? Just ensure your bihon gets well acquainted with the water until they're beautifully softened and hydrated.

10. Flavor Bombshell: Season Up!
Lastly, pour in that Soy sauce and sprinkle your All-In-One Seasoning Mix. Stir everything together meticulously until your Bihon Guisado is uniformly colored and the flavors penetrate every strand of your thin, now fabulous rice noodles. Voilla!

Now that you've hopped on this exciting culinary journey, you can proudly say you've mastered a classic Filipino dish - Bihon Guisado!

Ingredients:

1 pack (105 grams) Pansit bihon,
1 tablespoon (15ml) Cooking oil,
1/4 cup (35 grams) Onion, sliced,
2 tablespoons (24 grams) Garlic- minced,
1 cup (100 grams) Chayote (Sayote), sliced,
2 cups (500 ml) Water,
2 teaspoons (10ml) Soy sauce,
1 cup (50 grams) Cabbage - sliced,
1 pack (8 grams)ALL-IN-ONE SEASONING MIX


Saturday, July 1, 2023

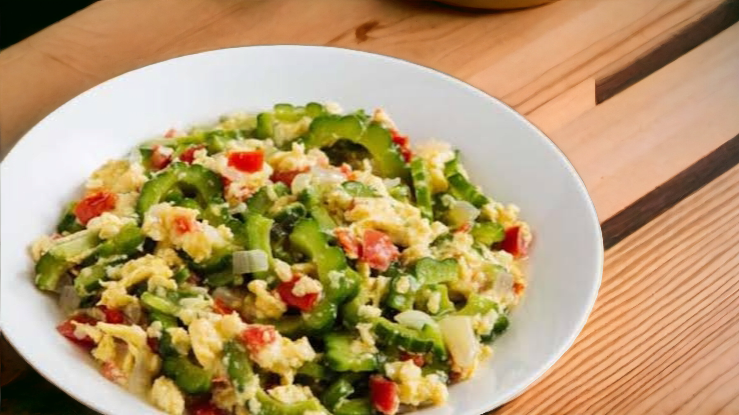
Bitter No More: A Fun Simplified Guide to Whip Up Your Own 'Ginisang Ampalaya'

Want to conquer cooking up the famously healthy yet underrated 'Ginisang Ampalaya'? Dive into our fun guide distributed over ten valuable sections! Stay tuned till the end; there's much to learn, experiment, and enjoy!

What’s cookin’, good lookin’? Looking to whip up something both nutritional and unconventional? Well, you're in the right kitchen, my friend!

1. Introduction: An Introduction into the World of Ampalaya
First off, what is this mystery dish? It's a classic Filipino dish often shied away from due to the intimidating bitterness of its primary ingredient—Ampalaya or Bitter Melon. But hey, no pain, no gain, right? 

Let's not forget about its medicinal benefits—it's a natural solution for numerous bodily concerns, which is why this vegetable is highly recommended. Today, we're all about turning this maligned veggie into a dish you’ll cherish - Ginisang Ampalaya!

2. Party of Ingredients: Get Ready with Your Ingredients
Before we start cooking up a storm, let’s make sure we're all set. You know what they say, a well-prepared cook is king! In my case, queen, but let’s not get sneaky with semantics. 

Preparing ingredients means assembling our fabulous five: 4 cloves of Garlic, 1 pc of Red Onion, 2 pcs of Tomato, and 0.5 kg of Ampalaya. Oh, and let's not forget the Oscar-winning duo of 2 pcs of Egg and 0.5 cup of Water. 

3. Choosing Your Star: Picking the Perfect Ampalaya
The heart of our dish is the Ampalaya itself. Ideally, go for young, green ones – they’ll be less bitter! When picking them out at the market, ensure they're firm, shiny, and without blemishes. 

Don’t forget to keep an eye on size too, we're aiming for consistency here, my uber talented kitchen companion. And remember, don’t judge a book by its cover - some of the best Ampalayas are hidden gems!

4. Slice and Dice: Prepping the Ampalaya
Prepping your Ampalaya can be fun, believe me! You’ll be a slicing and dicing professional after this. Cut your Ampalaya lengthwise and scrape off those seeds and pith. 

Next, slice them into thin half-moons. Now comes the twist: sprinkle salt on these slices and let it sit for 10 minutes. The salt will draw out the bitterness and you can then blitz it off with cold water.

5. Flavors Unite: Sauteeing the Base
Ready to drive your senses wild with amazing aroma? Then let’s fire up that stove and get cracking! Start by sautéing your finely chopped Garlic, Red Onion, and diced Tomatoes. 

Keep sautéing till you get a beautiful medley of sweetness from onion and tomatoes, and a tantalizing aroma of garlic wafting in your kitchen. Remember, your base flavors are a big deal in this dish!

6. The Main Attraction: Cookin' up the Ampalaya
In goes our Ampalaya! Stir fry it with the garlic-onion-tomato mix. The key here is patience as Ampalaya tends to take its sweet time to soften up. 

Pour in your 0.5 cup of Water to speed up the softening process, let it simmer, and don’t forget to sprinkle some of that Filipino magic - salt and pepper!

7. Bringing on the Scramble: Adding in the Eggs
Here comes my favorite part - scrambling in the Eggs! Just beat the Eggs, and pour them directly onto the Ampalaya mix. Stir ‘em in until they're fully combined. 

The Eggs not only amp up the nutrition value but also create a stunning marriage of textures with our star ingredient.

8. The Final Touch: Seasoning Your Dish
Before we take off our ever so stylish aprons, let's ensure our masterpiece is well seasoned. A bit of pepper and a little more salt should do the trick. But remember, taste as you go, we don’t want a salty mess, do we?

9. Plating and Presentation: Serving Your Masterpiece
Phew, we've made it! Now all that's left is to splendidly serve your masterpiece. The aesthetics of home-cooked meals are underrated, aren't they? Plate your Ginisang Ampalaya like you mean it, maybe atop a steaming hot mound of rice.

10. Final Thoughts: On Conquering the Bitterness
Bingo! You’ve successfully cooked your first, or maybe tenth, Ginisang Ampalaya! The trick was in conquering our fear of the bitter Ampalaya, wasn’t it? Grab a seat, dear friend, and enjoy the fruit...err, vegetable, of your hard work.

Ingredients:
4   cloves Garlic,
1   pc. Red Onion,
2   pcs. Tomato,
0.5   kg. Ampalaya,
2   pcs. Egg,
0.5   cup Water


Friday, June 30, 2023

The Kitchen Maestro’s Guide: Whipping up a Filipino Favorite - Pocherong Manok Guaranteed to Make You Swoon!


Embark on a Filipino culinary adventure with our easy, step-by-step guide to a heartwarming Pocherong Manok! With chicken, kamote, saba bananas, and a perfect balance of spices, your dinner table is set to impress!

1. Catching the Chicken Chase

Hey there, food adventurers! Have you ever had a taste of Filipino cuisine? Our lively kitchen takes an exciting twist today as we dive into cooking a Filipino traditional dish - Pocherong Manok. But don't sweat, we've got everything under control with half a kilo of chicken up for a sensational ride! Here’s a cozy dish that will not only fill your stomach but stir up nostalgia in every Filipino's heart!

Now, remember, any dish starts with quality ingredients. Start with a clean chicken, cut into serving pieces. The flavor and texture of your Pocherong Manok significantly depend on the quality of this bird. 

2. Oiling Up for the Filipino Express

Let's pump up the energy with two tablespoons of vegetable oil! High-five to our health-conscious amigos - this recipe doesn't slouch on keeping things heart-friendly. In our well-loved wok, let's heat things up, making sure that every bit of your chicken gets that sunny, golden brown color as it dances around.

3. Sweet Kamote Capers

Next up, we've got sweet potatoes, or as we locals fondly call it - "kamote!" Armed and ready, spud it up by peeling one piece of kamote, chopping it up to desirable sizes that can swim right alongside our chicken in the savory sea of our Pocherong Manok.

Complementing our kamote capers, let's not ignore our Saba bananas - two lovely pieces waiting to offer their sweet melodies to our symphony of flavors — peel them and set it aside for now. Don’t they look excited?

4. The Bold Garlic Stand

"Four cloves of garlic?" You might ask. Yes! For this dish, we'll need four cloves of garlic, minced to enhance that flavorful twist. Trust me; once they hit the pan, your kitchen’s going to smell divine!

5. Where Onions Make Our Eyes Pop

Let's get chopping with one piece of onion. Its rich, slightly sweet taste dances perfectly in contrast with the tangy tomato sauce we'll be using. 

6. Chorizo De Bilbao: The Showstopper

Every great production needs a star, and here enters our Chorizo De Bilbao - rare and exotic, full of drama and zest. One piece of this beauty teases our taste buds alongside our humble chicken, creating a fusion of tastes undeniably spectacular!

7. Cue the Tomato Sauce Applause

Say it with me — one cup of tomato sauce! This rich, zesty element brings out a lovely tang synonymous with Filipino-style stews. It also adds a characteristic hue to the dish that gives your Pocherong Manok the vibrant “Come-eat-me” look! 

8. Riding the Watery Waves

Next, imagine two generous cups of water – the ‘giver of life’ in our kitchen escapade. And you wouldn't believe what Bay leaves could do; one precious piece adds an aromatic depth to the stew that's subtle but impactful. 

9. Chickpeas Chariots

Now, say hello to chickpeas! Half a cup of these golden gems adds texture and a slightly nutty flavor that brings balance to our Pocherong Manok, ensuring that every spoonful is downright spectacular.

10. The Final Plating Symphony

When you've let all those ingredients mingle and marinate in beautiful harmony, and the end sight of it makes your mouth water – then you know you've indeed created a masterpiece in the kitchen!

Phew! Wasn't that a fun kitchen adventure?** We've unlocked the secret to Pocherong Manok – a dish that combines humble ingredients and transforms them into a heartwarming ensemble! Remember, cooking is all about love, so share this with everyone and spread the joy!

Let's eat, or as they say it in Filipino - "Kainan Na!"

Ingredients:

0.5   Kg. Chicken,
2   tbls. Vegetable Oil,
1   Piece Kamote,
2   Pieces Saba Banana,
4   Cloves Garlic,
1   Piece Onion,
1   Piece Chorizo De Bilbao,
1   Cup Tomato Sauce,
2   Cups Water,
1   Piece Bay Leaf,
0.5   Cup Chickpeas


Thursday, June 29, 2023

Cozy Comfort Food: Unmasking the Magic of Chicken Arroz Caldo - Cooking made Simple


Discover the joys of cooking Chicken Arroz Caldo in this immersive blog! From a bare pantry to a steaming pot, this post takes you on a flavorful journey that transforms simple ingredients into an exotic culinary experience. Time to cook your heart out!
Hey there food lovers! Glad to see you swooped in today. We're cracking open grandma's secret recipe for Chicken Arroz Caldo. Want to savor a bowl of comforting, hearty, and quintessentially Filipino deliciousness? Brace yourself. Here comes a home-style treat - straight from my kitchen to yours.

The Prelude to Magic

Digging into a bowl of Chicken Arroz Caldo feels like embracing grandma’s love – very cozy, very heartening. With chicken, rice, and a few magical ingredients, you can cook a delightful meal that warms you up, graced by a harmonious blend of flavours; it's Philippines in a bowl for you!

Sprays and Sauté

The first chapter of this culinary journey starts with our cast - 4 pieces chicken wings and 2 tablespoons vegetable oil. Crank the heat up and let these two dance in your hot sizzling pan. They might sizzle and pop, but don’t worry, that’s the sound of deliciousness in the making.

Garlic and Ginger Charades

Brace your senses for an aromatic assault as you toss in 4 cloves of garlic and 2 pieces of ginger into the mix. As they mingle and sauté, the spicy fragrance of ginger melds with the alluring garlicky essence. Our chicken wings are all dressed, oh-so ready for the next phase.

Unleashing the Lachrymose Onions

Next in line is our one-piece onion. Chop it up and set it loose in the pan. Watch as it sizzles and turns a beautiful shade of golden brown. Don't shed a tear. That’s our onion, shedding its layers and blending its sweetness with our searing trio.

Gleaming Glutinous Grains

Toss in 6 tablespoons of glutinous rice next. As you stir, take pleasure in the symphony of aromas and the slightly nutty whiff of rice. The glossy grains will absorb all the flavorful goodness, turning into these chubby pearls of deliciousness.

Water - The Marrow of Melting Pot

Time to pour in 6 cups of the elixir of life. Yup, plain old water. Watch it merge with the sizzling mix, sizzle and bubble, inviting all our primary actors to blend into incredible oneness. This section might take a while, so relax and soak in the simmering suspense.

Kasubha - The Golden-Orange Elf

Remember, patience rewards you generously. At the right moment, introduce 1 oz. of Kasubha and let the magic unfurl. This golden-orange elf turns the arroz caldo into a sun-kissed spectacle.

Ground Pepper - The Shadow Interplay

Sprinkle the pot with a 0.25 teaspoon measure of ground pepper, casting delicious shadowy interplay on the Arroz Caldo theatre, giving the fair Kasubha a scintillating contrast.

Is it a bird? Is it air? No, it's Chicharon!

Halfway through, we turn flight with 0.5 cups of Chicharon! Their crunchy pride is soon humbled in the steamy pot, lending the Arroz Caldo a characteristically enjoyable texture.

The Egg-xemplary Addition

Add 3 boiled eggs, and watch as they float buoyantly, looking like beckoning islands in our ocean of flavors. Their creamy interiors will give an eggstra touch to our simmering symphony.

Toasted Garlic - The Star-Spangled Diva

As the pot simmers, introduce 1 tablespoon of toasted garlic. Like a star-spangled diva, it'll add glamour and texture to our Arroz Caldo, defining the flavor profile like nothing else!

The Onion Springs - Green Tendril Waltz

Drop in 1 tablespoon of onion springs next, watch them twirl and waltz on the now richly decorated stage of our pot. Add that pop of colors, that crunch, that onion-y sparkle to your dish.

Lime/Calamansi – The Zesty Finale

For a zesty finale, squeeze in 6 pieces of lime or calamansi, injecting that tangy goodness into our Arroz Caldo. Their acidic notes will cut through the robust flavors with a refreshing charm!

Serving Deliciousness

Now that Chicken Arroz Caldo’s done cooking, dishing it out is a true delight! Enjoy the medley of colors, flavors and textures in each spoon. This isn't just food; it's an immersive cultural experience.

Last Call

Congratulations! You've created a pot of Chicken Arroz Caldo magic, as entertaining to cook as it is delightful to devour. Now to grab your bowl, nestle on your favorite spot, and enjoy. Feel it warm your belly, tickle your palate, and delight your soul in every slurp!

Ingredients:
4   Pieces Chicken Wings,
2   tbls. Vegetable Oil,
4   Cloves Garlic,
2   Pieces Ginger,
1   Piece Onion,
6   tbls. Glutinous Rice,
6   Cups Water,
1   oz. Kasubha,
0.25   tsp. Ground Pepper,
0.5   Cup Chicharon,
3   Pieces Egg,
1   tbl Toasted Garlic,
1   tbl. Onion Springs,
6   Pieces Lime/calamansi


Wednesday, June 28, 2023

The Piquant Panorama of Pancit Palabok: Your Unofficial Imbue-the-Aroma Kitchen Guide


Dabble in the richness of Filipino cooking with our step-by-step, vibrant guide on cooking Pancit Palabok – a scrumptious noodle dish jam-packed with flavors from shrimp, Tinapa flakes, and a ton of other tasty ingredients. Join us on this culinary journey & become the "Kitchen Conqueror" you were always meant to be!

1.Introducing Your New Weekend Experiment: Pancit Palabok!

    Oh hey there, Kitchen Conquerors! Who is up for a saucy, slurpy, sizzling kitchen experiment this weekend? Today, we’re diving into the heart of Filipino cuisine and cooking up a storm with pancit palabok.

    Ever tried it before? Don’t panic if you haven't yet. That’s what this guide's for – to lead you step by step into crafting a fantastic pancit palabok – right from the cozy comforts of your home kitchen.

2. Know Your Palabok: Where it Began

    Pancit palabok is a standout in Filipino cuisine that never loses its charm, owing to its inviting yellow-orange hue and a medley of flavors. Some call it Pancit Luglug; either way – it is a flavor-packed bowl of sunshine!

    The secret sauce (pun totally intended), is the rich shrimp-flavored thick gravy, slathered onto thin rice noodles (pancit luglug) or thick rice noodles (pancit malabon). A scrumptious adventure, isn't it? Let's get down to it.

3. The Vibrant Veggies and Seafood

    What's a palabok without choice seafood? The key ingredients here are 0.5 kg shrimp, which will give our palabok its character. As for the veggies, get ready with 4 cloves garlic and 1 pc onion.

    Fret not - the shrimp isn’t the only star in our sea-inspired dish. You’ll also need 0.25 cup tinapa flakes! What is it? It's nothing but delicate, smokey fish flakes. Time to light up the kitchen!

4. Score With Sauces and Spices

    Put on your chef’s hat and get ready with the enriching agents: 3 tbsp vegetable oil and 2 tbsp fish sauce. Also, get your hands on 0.25 tsp ground pepper for that punch of spice.

    I mean, can you even imagine cooking without these faithful fellows? Drab and dull – that's what. Not in our kitchen, mate!

5. Rice, Noodles, and All Things Filling

    Ensure you have 0.15 kg pancit canton and 2 tbsp ground rice. Pancit canton is our noodle base and the face of our palabok while the ground rice bolsters all that saucy goodness.

    Hunger pangs, be prepared. This palabok is all capable of keeping you sated and enchanted!

6. Lift With Lye & Annatto

    Ever heard of annatto with lye? Today is that day. You'll need 1 tbsp for our stunning palabok. Extracted from achiote tree seeds, annatto gives our palabok its signature hue.

    Aren't we learning and cooking simultaneously? That's just the beauty of getting into the kitchen and getting down to whisking, stirring, and grilling, right?

7. Get Garnishing: Let's Adorn

    Without a garnish, our fanciful palabok is like a Christmas tree sans ornaments! Our garnish includes 0.25 cup chicharon, 1 tbsp toasted garlic, 1 tbsp onion springs, and 2 pcs eggs.

    The garnishing phase is an aesthetic one, full of joy and anticipation. After all, it signifies nearing the finish line!

8. Side Attractions: Lime & More

    Got 8 pcs lime at hand? Great, they're going into our palabok! That tangy kick isn't just a delightful surprise, but also a cleansing agent, making every bite feel fresh and new.

    Just like a head-banging rock concert, a jive-worthy bowl of pancit palabok is incomplete without its own set of side attractions, right?

9. Time To Walk the Talk: Prep Begins

    So our ingredient walk-through brings us to the core phase - actual cooking! You've prepped, and now it's time to step up and concoct our majestic palabok. Shall we?

10. Shrimp Extraction: Crafting the Base

    First, we boil the shrimp in 3 cups of water until cooked, then peel them and set aside. But don't toss the shells and heads! Those are gold for our shrimp sauce.

    Shrimp-stock time! Boil the shells and heads, let it steep, and then strain the juice. Ahh, the tantalizing aroma already has us excited!

11.Sauté Starter: Where It All Kicks Off

    Heat the vegetable oil in a pan and throw in the chopped garlic and onions. As they sizzle and their fragrances meld, you'll feel like a magician creating a spell—and truly, you are.

    Now, stir in your ground rice and annatto with lye water. Smell the transformation? That’s the allure of cooking – the build of aromas, flavors, and yes, the thrill!

12. Shrimp-Stock Stir-In

    Add in the shrimp stock and let this ingenious mix simmer until it thickens. Now add the shrimps and fish sauce. The blend of flavors will make your heart sing and stomach growl.

    So far, so yummy? Wait till we add in the pancit canton. Then, it's a fiesta!

13. Adding Noodles and Spices to the Mix

    We now soak our pancit canton until it softens. Add it to our majestic blend along with the ground pepper. Watch it transform into a master dish right in front of your eyes.

    We are almost there, folks! You've been doing fabulously well!

14. Garnish and Serve: The Grand Finale

    Pour the saucy mix over your noodles, and it's garnish time! Spread those tempting Tinapa Flakes, crispy Chicharon, fried garlic, hard-boiled eggs, and spring onions uniformly over the dish.

    Gosh, don’t you feel like a top-notch chef, presenting your masterpiece? You bet!

15. Final Touch: Lime and Love

    Just when you thought it couldn't get any better, add a slice of lime on the side, or squeeze all over for that tangy twist. Your pancit palabok is now ready to serve!

    Well done, you Kitchen Conqueror! You just crafted a Filipino classic. Now, dig in and bask in your culinary glory!

Ingredients:

0.5   kg. Shrimp,
3   tbsp. Vegetable Oil,
3   cups Water,
4   cloves Garlic,
1   pc Onion,
2   tbsp. Ground Rice,
1   tbsp. annatto with lye,
2   tbsp Fish Sauce,
0.25   tsp. Ground Pepper,
0.15   kg. Pancit Canton
0.25   cup Tinapa Flakes
0.25   cup Chicharon
1   tbsp. Toasted Garlic
1   tbsp. Onion Springs,
2   pcs. Egg,
8   pcs. Lime/Calamansi