Wednesday, August 30, 2023

Mastering the Art of Steamed Maya-Maya: A Delicious Seafood Delight

Learn the secrets of cooking tender and flavorful Steamed Maya-Maya, a popular fish dish in the Philippines. This step-by-step guide will take you through the process of preparing this mouthwatering delight using fresh ingredients, delightful spices, and expert techniques. Get ready to impress your family and friends with your culinary skills as you create a delightful seafood masterpiece!

Introduction:

Welcome to the world of culinary delights! In this blog post, we're going to dive into the enticing realm of cooking Steamed Maya-Maya, a traditional and scrumptious Filipino fish dish. The combination of succulent snapper, aromatic herbs, and flavorsome spices is sure to stimulate your taste buds and transport you to tropical shores. So, roll up your sleeves, put on your apron, and let's get started on this delicious adventure!

1: Gathering the Ingredients

Before we embark on our cooking journey, let's gather all the fresh ingredients together. Here's what you'll need:

- 0.75 kg Snapper
- 2 pieces Ginger
- 1 piece Onion
- 4 cloves Garlic
- 0.5 cup Water
- 2 tbsp Soy Cooking and Seasoning Sauce
- 2 tsp Sesame Oil
- 1 tbsp Brown Sugar
- 3 sprig Cilantro
- 1 stalk Scallion

It's important to use fresh and high-quality ingredients to ensure the best possible flavors. Head to your local market or fishmonger to source the freshest Maya-Maya (Snapper) available. Remember, the quality of the fish is integral to the overall taste of your dish!

2: Preparing the Ingredients

Properly preparing the ingredients is crucial to achieving a delectable outcome. Let's start by cleaning and preparing our fish.

Begin by rinsing the Snapper under cold water to remove any impurities. Pat it dry with paper towels and set it aside. Next, peel and slice the ginger into thin strips. Finely chop the onion, garlic, cilantro, and scallion. Now that our ingredients are nicely prepared, we can move on to the next step.

3: Setting Up the Steaming Equipment

To cook Steamed Maya-Maya to perfection, you'll need a steaming setup. If you have a bamboo or metal steamer, that works perfectly. Otherwise, a regular steamer pot with a rack will do the job just fine.

Fill the pot with about an inch of water and bring it to a boil. While the water is heating up, let's move on to marinating our fish.

4: Marinating the Fish

Marinating the fish is the key to infusing it with incredible flavors. In a bowl, combine the soy cooking and seasoning sauce, sesame oil, brown sugar, chopped garlic, and half of the chopped ginger. Mix the ingredients together until they form a well-combined marinade.

Place the snapper on a plate or a shallow dish, then pour the marinade over it, ensuring that the fish is evenly coated. Sprinkle the remaining ginger on top of the fish, and let it marinate for about 20 minutes. This will allow the flavors to permeate the fish, enhancing its taste and tenderness.

5: Assembling the Steamer

With the marinade working its magic on the fish, let's assemble our steamer. Place the fish on a heatproof plate or dish that will fit inside your steamer. Make sure to leave some space around the fish to allow steam circulation.

Once the water in the pot is boiling, carefully place the dish with the marinated fish into the steamer. Cover the steamer tightly to trap the steam and start the cooking process. Steaming Maya-Maya gently allows the fish to retain its moistness while the flavors meld together beautifully.

6: Steaming the Maya-Maya

Now that the fish is nestled comfortably in the steamer, it's time to let the magic happen. Steam it on medium-high heat for about 15-20 minutes, or until the fish turns opaque and easily flakes with a fork. Avoid overcooking the fish to retain its tenderness and ensure that it doesn't become dry.

While the fish is steaming, prepare the flavorful garnish.

7: Preparing the Garnish

To complement the delicate flavors of the Steamed Maya-Maya, let's prepare a refreshing garnish. Finely chop some cilantro and thinly slice the scallions. These vibrant green additions will add a burst of freshness to the dish and enhance the visual appeal.

Once you've finished preparing the garnish, your perfectly steamed Maya-Maya should be ready, tempting you with its enticing aromas.

8: Serving the Steamed Maya-Maya

With the fish cooked to perfection, it's time to plate up this delectable dish. Gently transfer the steamed fish to a serving platter, retaining its shape as much as possible. Drizzle the remaining marinade over the fish, allowing its rich flavors to mingle.

Sprinkle the freshly chopped cilantro and sliced scallions on top for that burst of freshness. Now, take a step back and admire your culinary masterpiece!

9: Pairing and Enjoying the Delight

Steamed Maya-Maya is wonderfully versatile and pairs well with various side dishes. Serve it with steamed jasmine rice and stir-fried vegetables, such as bok choy or Chinese broccoli, to create a well-rounded meal. The delicate flavors of the fish will blend harmoniously with the vibrant accompaniments.

As you take your first bite, savor the rich, delicate flavors of the moist and flaky fish. The tender flesh, infused with the aromatic ginger and the savory nuances of the marinade, is a true delight for seafood lovers.

Final Thoughts

Congrats! You've successfully mastered the art of cooking Steamed Maya-Maya. With its simple yet refined flavors, this dish is sure to become a favorite not only in your kitchen but among family and friends as well. Remember, practice makes perfect, so don't be afraid to experiment with the marinade or try different garnishes to spice up your culinary adventures.

So, gather your loved ones, share this delightful dish, and enjoy the pleasure of savoring Steamed Maya-Maya together. Happy cooking!


Monday, August 28, 2023

Pork Igado: A Satisfying Filipino Heritage Dish


Learn how to cook the savory and hearty Filipino dish, Pork Igado, with this step-by-step guide. Packed with flavorful ingredients like pork, liver, and vegetables, this classic recipe is sure to please your taste buds.

When it comes to Filipino cuisine, one dish that stands out is Pork Igado. This flavorful and hearty meat dish has been a staple in many Filipino households for generations. Its unique combination of succulent pork, tender liver, and an assortment of vegetables makes it a perfect meal for gatherings or just a comforting dinner at home. In this blog post, we will guide you through the process of cooking Pork Igado, so get ready to embark on a culinary adventure filled with mouthwatering flavors and irresistible aromas.

1: Gather Your Ingredients

First things first, let's gather all the ingredients you'll need to make a delicious batch of Pork Igado. You'll need the following:

- 0.5 kg of pork shoulder, cut into bite-sized pieces.
- 0.25 kg of pork liver, sliced into thin strips.
- 3 tbsp of vegetable oil.
- 4 cloves of garlic, minced.
- 1 medium-sized onion, chopped.
- 0.25 cup of cider vinegar.
- 0.25 cup of soy sauce.
- 1 finger chili, sliced.
- 1 bay leaf.
- 2 cups of water.
- 0.5 cup of green peas.
- 1 red bell pepper, cut into strips.

2: Preparing the Pork and Liver

Start by marinating the pork shoulder and liver in a mixture of soy sauce and vinegar. This step helps infuse the meat with the flavors of the marinade, resulting in a more flavorful dish.

3: Sautéing the Aromatics

In a large pan or pot, heat the vegetable oil over medium heat. Once hot, add the minced garlic and chopped onion. Sauté them until fragrant and the onion turns translucent.

4: Cooking the Pork and Liver

Next, it's time to add the marinated pork shoulder to the pan. Cook it until it turns brown and slightly caramelized on the edges. This step adds a depth of flavor to the dish.

Once the pork is cooked, add the marinated liver to the pan. Be careful not to overcook the liver as it can become tough and lose its tenderness. Cook it just until it turns brown but is still slightly pink in the center.

5: Simmering the Igado

After the pork and liver are cooked, it's time to add the remaining ingredients to the pan. Pour in the water, add the finger chili, bay leaf, and green peas. Stir everything together and let it simmer for about 10 minutes to allow the flavors to meld together.

6: Adding the Final Touches

To elevate the appearance and taste of your Pork Igado, add the sliced red bell pepper to the pan. The vibrant color and sweet crunch of the bell pepper add a beautiful contrast to the rich flavors of the dish.

7: Adjusting the Seasoning

Taste your Pork Igado and make any necessary adjustments to the seasoning. If it needs more saltiness, you can add a splash of soy sauce. If it needs a bit more acidity, a drizzle of vinegar will do the trick. Cooking is all about finding the perfect balance of flavors, so trust your taste buds!

8: Serving Suggestions

Pork Igado is traditionally served with steamed rice, but feel free to get creative with your sides. You can serve it with warm bread, mashed potatoes, or even on its own as a hearty stew. Garnish with fresh cilantro or spring onions for an added layer of freshness and aroma.

9: Storing and Reheating

If you have any leftovers, you can store them in an airtight container in the refrigerator for up to three days. To reheat, simply warm it up in a pan over low heat, stirring occasionally until heated through. The flavors may even deepen and intensify the next day.

10: Share and Enjoy!

Now that you've mastered the art of cooking Pork Igado, share this delightful dish with your loved ones and enjoy the heartwarming flavors and comforting aromas of this beloved Filipino favorite. Remember, cooking is all about creativity and making memories in the kitchen, so don't be afraid to add your own twist to this classic recipe.


Sunday, August 27, 2023

A Seafood Fiesta: Mastering the Art of Cooking Mixed Seafood with Oyster Sauce


Dive into the depths of seafood heaven with our guide on how to cook Mixed Seafood with Oyster Sauce. Discover the perfect harmony of flavors as you indulge in succulent shrimp, tender squid, and briny mussels. Master the art and savor the ocean's bounty with this delectable recipe that's sure to impress your taste buds. A seafood fiesta awaits you!

Welcome to the world of flavorful and succulent seafood! If you're craving a delightful culinary adventure, look no further. In this blog post, we'll dive into the depths of the ocean to bring you a tantalizing recipe for cooking Mixed Seafood with Oyster Sauce. Get ready to tantalize your taste buds with a fantastic medley of flavors! Whether you're a seafood connoisseur or a curious amateur, this guide will equip you with the skills to create a palate-pleasing dish. So, let's set sail and embark on this delicious journey together!

1: Gathering the Essentials

Before we get down to business, let's make sure we have all the necessary ingredients for our Mixed Seafood with Oyster Sauce:
- 0.5 kg Mussels
- 0.5 kg Squid
- 4 tbsp Vegetable Oil
- 4 cloves Garlic
- 1 pc Onion
- 1 stalk Celery
- 1 pc Red Bell Pepper
- 0.5 kg Shrimp
- 6 tbsp Oyster Sauce
- 0.25 tsp freshly ground pepper
- 2 tbsp Cornstarch
- 1 stalk Scallion

2: Preparing the Seafood

To ensure your seafood is at its finest, it's crucial to prepare it properly. Let's start with the mussels. Rinse them thoroughly under cold water, removing any dirt or debris. Next, trim the beards and discard any mussels that remain open.

For the squid, remove the head and tentacles, setting them aside for later. Rinse the body and peel off the outer skin. Now you're left with squid tubes, ready to be sliced into rings.

3: Sautéing the Aromatics

Heat the vegetable oil in a large pan over medium-high heat. Add the minced garlic and sauté until fragrant, creating a delightful aroma that will make your mouth water. Then, add the finely chopped onion, celery, and red bell pepper. Cook until the vegetables turn tender-crisp, releasing their vibrant colors.

4: Adding the Seafood Medley

Now it's time to toss in our star ingredients—the shrimp, squid, and mussels. Add them to the pan, stirring gently to combine them with the sautéed aromatics. Watch as the seafood starts to transform, turning from raw to vibrant and flavorful.

5: Infusing the Oyster Sauce Magic

Pour in the oyster sauce, coating the seafood evenly. Allow the sauce to infuse its umami magic into every bite. Sprinkle the freshly ground pepper and stir gently to incorporate the flavors.

6: Binding it All Together

In a separate bowl, dissolve the cornstarch in water, creating a smooth slurry. Gradually add the slurry to the simmering seafood, stirring continuously. The cornstarch will thicken the sauce, creating a luscious coating that will cling to each piece of seafood.

7: Adding the Final Touch

Slice the scallion into thin rounds and add it to the pan. This will add a fresh and aromatic element to the dish, enhancing the overall experience.

8: The Art of Serving

Mixed Seafood with Oyster Sauce is best enjoyed hot off the stove. Arrange it on a platter and garnish with a few sprigs of fresh herbs for an aesthetically pleasing presentation. Serve it alongside steamed rice or a crusty baguette, allowing your taste buds to relish the harmonious blend of flavors and textures.

9: A Culinary Adventure Finale

Congratulations! You've successfully embarked on a culinary adventure, creating a delectable Mixed Seafood with Oyster Sauce. The delightful harmony of flavors and the freshness of the seafood will have you craving more in no time.

10: Tips and Tricks

- Experiment with different types of seafood, such as scallops or clams, to add variety to your dish.
- If you prefer a touch of heat, sprinkle some red chili flakes or add a dash of your favorite hot sauce.
- Consider adding some diced tomatoes or a splash of white wine to elevate the overall taste.
- Don't overcook the seafood to preserve their tenderness and juiciness.
- Remember to adjust the seasoning according to your personal preference.


Friday, August 25, 2023

Callos Recipe: A Hearty Spanish Delight to Satisfy Your Taste Buds


Learn how to cook Callos, a traditional Spanish stew, with this easy-to-follow recipe. Full of tender meat, flavorsome chorizo, and delightful spices, this dish will transport your taste buds to Spain. Follow our step-by-step guide and discover the culinary secrets behind Callos. Serve it with rice or bread and impress your friends and family with your cooking skills. Don't miss this opportunity to savor a hearty Spanish delight!

Welcome to our kitchen, where we're about to embark on a culinary adventure to create a mouthwatering dish - Callos! Callos is a traditional Spanish stew known for its rich flavors and tender meat. In this blog post, we'll guide you through the step-by-step process of cooking this savory recipe. So, grab your apron and let's get started!

1: Gathering the Ingredients
To begin this culinary escapade, gather the following ingredients: 1/2 kg beef brisket or tripe, 4-8 cups water (or as needed), 1 pc Beef Cube, 2 tbsp oil, 1 pc red onion (sliced), 1 pack Complete Recipe Mix Kaldereta (dissolved in 2 1/2 cups broth), 1 cup chorizo de bilbao (sliced), 1/4 cup garbanzos, 1 pc potato (diced - optional), 1 pc carrot (diced - optional), 1 pc bell pepper (optional), black pepper, chili flakes or paprika (to taste). Now that you have everything ready, let's dive into the actual cooking process!

2: Prepping the Meat and Vegetables
Start by cleaning the beef brisket or tripe thoroughly under running water. Pat it dry with a paper towel and then cut it into bite-sized pieces. If using tripe, ensure it's cleaned properly before proceeding. Next, slice the chorizo de bilbao and red onion.

3: Sautéing the Ingredients
Place a large pot over medium heat and add the oil. Once the oil is hot, add the sliced chorizo de bilbao and cook until it releases its oils and turns slightly crispy. This step will infuse the dish with a smoky and flavorful essence. Now, add the sliced red onion and sauté until it becomes translucent.

4: Browning the Meat
Increase the heat slightly and add the beef brisket or tripe to the pot. Brown the meat on all sides to lock in the flavors. This process will add depth to the dish, ensuring a delightful dining experience.

5: Adding the Flavors
Once the meat is evenly browned, dissolve the Beef Cube in the beef broth. Add the dissolved kaldereta mix and the beef broth to the pot. Stir well to combine all the flavors. Now, sprinkle some black pepper, chili flakes, or paprika, adjusting the spice level according to your taste preference.

6: Simmering to Perfection
Lower the heat and cover the pot. Allow the mixture to simmer gently for about 2-3 hours, or until the meat becomes tender and the flavors meld together harmoniously. Stir occasionally and add water as needed to maintain the desired consistency.

7: Additional Ingredients to Amp Up the Flavor (Optional)
If you wish to add extra elements to your Callos, consider tossing in diced potatoes, carrots, and bell peppers. These vegetables will further enhance the texture and provide a burst of freshness to the dish. Introduce them to the pot about 30 minutes before the end of the cooking time.

8: Serving Suggestions
Now that your kitchen is filled with delightful aromas, it's time to plate up! Callos is best enjoyed with steamed rice, or you can savor it alongside warm crusty bread. Garnish each serving with fresh cilantro or parsley to add a touch of vibrancy. Serve it hot and watch as your family and friends dive in with gusto!

9: Storing and Reheating
If you have leftovers, store them in an airtight container in the refrigerator. Callos tastes even better the next day as the flavors continue to mingle. Reheat it gently on the stovetop over low heat or in the microwave.

10: The Final Verdict
Congratulations! You've mastered the art of cooking Callos, a Spanish dish that will undoubtedly impress your taste buds. Are you ready to indulge in the delectable flavors and tender meat of this hearty stew? Head to the kitchen and prepare this magnificent gastronomic creation for yourself. ¡Buen provecho!


Thursday, August 24, 2023

A Gastronomic Adventure: Cooking Lawuy with Locally-Sourced Ingredients

Embark on a gastronomic adventure as we guide you through the step-by-step process of cooking Lawuy, a delicious Filipino vegetable and fish stew. Discover the harmony of flavors and cultural significance behind this traditional dish, while customizing it to suit your taste. Join us as we celebrate the beauty of locally-sourced ingredients and the joy of communal dining with Lawuy.

Welcome to our creative kitchen, where we're about to take you on a flavorful journey with a Filipino classic dish called Lawuy. This hearty vegetable and fish stew is not only delicious but also packed with nutrients. In this blog post, we'll guide you through the process of cooking Lawuy step by step. Prepare your taste buds as we explore the beautiful combination of flavors and textures that make this dish truly special.

1: Gathering the Ingredients
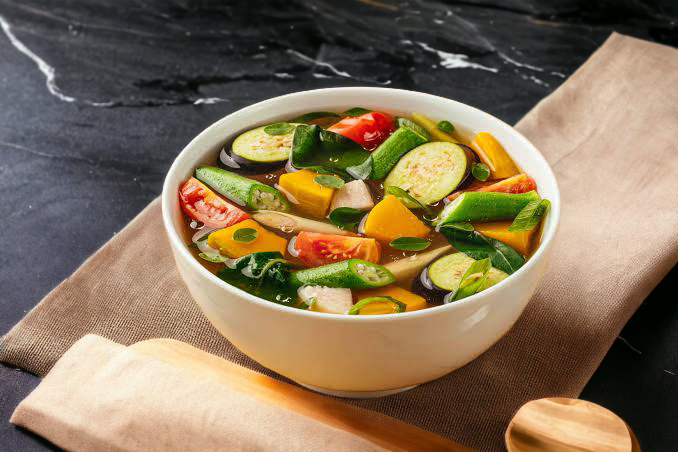
To start off, let's gather all the fresh ingredients required to create this delicious Lawuy dish. You'll need the following items: 1 pc Gabi, 1 pc Ginger, 1 stalk Lemongrass, 3 cups Water, 1 cup Kalabasa, 1 pc Eggplant, 0.5 cup Okra, 0.5 cup Patola, 2 pcs Galunggong, 1 pc Red Onion, 2 stalks Onion Springs, 0.25 cup Malunggay, and 0.2 cup Saluyot. These ingredients will form the foundation of the dish and provide a mix of flavors that will tickle your taste buds.

2: Preparing the Ingredients
Now that we've gathered our fresh ingredients, it's time to prepare them for cooking Lawuy. Start by washing all the vegetables and fish thoroughly to remove any dirt or impurities. Peel the Gabi and ginger, and chop them into smaller pieces for easier blending later. Slice the lemongrass into smaller sections, ensuring they're easy to remove from the dish before serving. Cut the kalabasa, eggplant, okra, and patola into bite-sized pieces, ensuring uniformity for a visually appealing dish. Finally, clean the galunggong, removing the scales and innards while keeping the fish intact.

3: Sautee and Flavor Infusion
The secret to a mouthwatering Lawuy lies in the harmonious blending of flavors. Heat up a large pot and add a generous amount of oil. Now, sauté the red onion, ginger, and lemongrass until they release their irresistible aroma. As the kitchen fills with tantalizing scents, pour in the water and bring it to a boil. Allow the ginger and lemongrass to work their magic, infusing the liquid with a depth of flavor that will infuse every ingredient added later.

4: Adding the Vegetables
Once the broth is boiling, it's time to add the chopped kalabasa, eggplant, okra, and patola to the pot. Allow the vegetables to simmer in the flavorful liquid until they become tender but not overcooked. Be careful not to let the vegetables lose their crunch, as their texture adds a lovely contrast to the softness of the fish.

5: Time for the Galunggong
The star of the show, the galunggong, is ready to take its rightful place in our Lawuy masterpiece. Gently place the cleaned galunggong into the pot, carefully allowing the simmering broth to envelop it. The fish's natural oils will mingle with the flavorful broth, elevating the taste to new heights. Leave the pot to simmer until the galunggong is cooked through and easily flakes with a fork.

6: Adding the Finishing Touches
As the galunggong finishes cooking, it's time to add the final accents that will complete the Lawuy experience. Finely chop the onion springs and sprinkle them into the pot, giving the dish a burst of freshness. Follow this by incorporating the malunggay and saluyot, two greens that not only add vibrant color but also contribute beneficial nutrients. Allow the pot to simmer for a few more minutes, ensuring that the flavors meld together beautifully.

7: Serving the Lawuy
Congratulations, you've successfully cooked Lawuy! Carefully transfer the aromatic Lawuy into a serving bowl and inhale the delightful scent wafting through the air. As you admire the colorful medley of vegetables and fish, serve the Lawuy hot and steaming, maintaining its authentic charm. Pair it with a bowl of freshly cooked rice and enjoy the culmination of your hard work in this heartwarming dish.

8: Lawuy Variations and Customizations
While Lawuy is traditionally cooked with galunggong, there are endless possibilities for customizing this dish to suit your preferences. Feel free to experiment by substituting different fish varieties, such as tilapia or bangus, or even adding prawns for an extra touch of indulgence. For those seeking a vegetarian option, tofu makes a wonderful alternative to fish, contributing a unique texture to the Lawuy. Personalize the dish to your liking, and let your creativity shine.

9: The Cultural Significance of Lawuy
Lawuy holds a special place in Filipino culinary culture, representing the simple beauty found in local ingredients and traditional cooking methods. Passed down through generations, this dish symbolizes togetherness, as families gather to enjoy a hot bowl of Lawuy and share stories. Embrace the cultural significance of Lawuy as you savor each bite, knowing that you're taking part in a culinary tradition that has stood the test of time.


Cooking Lawuy is a delightful culinary adventure, immersing you in the flavors and cultural heritage of the Philippines. By following this simple, yet flavorful recipe, you can recreate this beloved dish right in your own kitchen. So, gather the ingredients, let the fragrant spices dance in your pot, and indulge in the comforting warmth of Lawuy - a dish that nourishes both body and soul.


Wednesday, August 23, 2023

Comfort in Every Bowl: Mastering the Art of Cooking Chicken Arroz Caldo


Dive into the flavorful world of Chicken Arroz Caldo. This informal guide will take you through the step-by-step process of cooking this Filipino comfort food. Warm your heart with each spoonful of this delicious dish, packed with tender chicken, aromatic rice, and optional toppings. Get ready to master the art of Chicken Arroz Caldo and create memories that will last a lifetime.

Welcome to our cozy and informal kitchen, where today we'll be delving into the delicious world of Chicken Arroz Caldo. Packed with flavors that will warm your heart, this Filipino comfort food is the perfect dish for chilly nights or whenever you crave something hearty. So, grab your apron and let's get cooking!

Gathering the Ingredients
To embark on this culinary adventure, gather the following ingredients: 2 tbsp cooking oil, 1 pc small-sized onion (chopped), 4 cloves garlic (chopped), 2 tbsp ginger (finely chopped), 200 grams cooked chicken breast (shredded), 1/2 cup uncooked Malagkit rice (washed twice and drained well), 2 pcs chicken cubes, 4 cups water. Optional toppings include 1 pc boiled egg (sliced), 1/4 cup spring onions (chopped), 1/2 cup fried dilis, and 1/4 cup thinly shredded dried seaweed sheets.

Prepare the Aromatics
In a deep pot over medium heat, heat the cooking oil. Once hot, add the chopped onion, garlic, and ginger. Sauté them until fragrant, allowing their enticing aroma to fill the kitchen. The active sizzling sound lets you know the flavors are developing beautifully.

The Magic of Chicken
Once the aroma has enveloped the room, add the shredded cooked chicken breast to the pot. Allow the chicken to mingle with the aromatic blend, creating a symphony of flavors. The active sizzling intensifies, promising a rich and satisfying dish.

Rice, The Ultimate Game Changer
Now, it's time to introduce the main player—uncooked Malagkit rice. Add it to the pot, combining it with the flavors already present. Stir the rice well, ensuring each grain is coated with the aromatic goodness. This step ensures the rice absorbs the flavors and contributes to the overall deliciousness.

Simmering Euphoria
To unlock the full potential of the dish, dissolve the chicken cubes in 4 cups of water and pour the mixture into the pot. Give it a good stir, encouraging the flavors to intertwine. Bring the pot to a boil, then reduce the heat to a gentle simmer. Allow the Arroz Caldo to simmer for around 30 minutes, giving the flavors a chance to intensify while the rice reaches that perfect, tender consistency.

Toppings, the Cherry on Top
While the Arroz Caldo simmers, prepare the optional toppings. Boil an egg, slice it, and set it aside. Chop some fresh spring onions and thinly shredded dried seaweed sheets. For an additional burst of flavor, fry some dilis until crispy and golden. These toppings will elevate your Chicken Arroz Caldo, making it a feast for the eyes and the palate.

Serving with Love
After the Arroz Caldo has simmered to perfection, serve it in a warm bowl. Top it off with the boiled egg slices, chopped spring onions, fried dilis, and shredded dried seaweed sheets. Feel free to get creative and add more toppings of your choice. Now it's time to indulge in this comforting dish, relishing every spoonful.

Leftovers? No Problem!
If you have leftovers (which is unlikely), refrigerate them and save them for a quick, satisfying meal later. When reheating, make sure to add a splash of water or broth to maintain the desired consistency.

Arroz Caldo Hacks and Variations
Feeling adventurous? Customize your Arroz Caldo by experimenting with different proteins or adding vegetables like carrots or mushrooms. Want a tangy twist? Squeeze some calamansi or lemon juice on top before serving - it's delightful! This versatile dish is open to interpretation and welcomes your culinary creativity.

Memories in Every Bowl
Arroz Caldo doesn't merely fill the stomach; it warms the soul. This traditional Filipino dish carries a rich history, reminiscent of generations gathered around a table, storytelling and sharing their love through food. In every delicious bite, you're keeping the tradition alive while creating new memories to be cherished.


Tuesday, August 22, 2023

Beef Ribs Sinigang: A Flavorful Twist to Pinoy Comfort Food

Indulge in the rich and tangy flavors of Beef Ribs Sinigang, a Filipino culinary delight. This informal guide walks you through the steps of cooking this soul-warming dish using succulent beef ribs, aromatic vegetables, and Sinigang sa Sampalok Original mix. Discover tips for tenderizing the ribs, achieving the perfect balance of flavors, and adding a spicy kick. With over 2000 words of mouthwatering guidance and an array of colorful ingredients, this recipe will leave you yearning for more. Enhance your cooking repertoire and treat your taste buds to a bowl of Beef Ribs Sinigang that captures the essence of Filipino comfort food.

Welcome to our kitchen, where we're about to embark on a sinfully delicious adventure with the classic Filipino favorite – Beef Ribs Sinigang! Brace yourself for an explosion of flavors that will ignite your taste buds and transport you to the heart of Filipino cuisine. This soul-warming dish combines the succulent goodness of beef ribs with the tangy and bold flavors of Sinigang sa Sampalok mix. Get ready to dive into this delightful culinary experience that will surely leave you craving for more.

1: Gathering the Ingredients
Before we dive into the cooking process, it's crucial to gather all the necessary ingredients. For our Beef Ribs Sinigang, you'll need 1 kg of mouthwatering beef ribs, 2 pieces of quartered tomatoes, 2 pieces of quartered onions, 1 pack of Sinigang sa Sampalok Original (approximately 20 g), 1 sliced radish, 1 sliced eggplant, 2 pieces of sili sigang (green chili peppers), and a bunch of fresh kangkong leaves and stalks for that vibrant green touch.

2: Preparing the Beef Ribs
Let's kick-start our Beef Ribs Sinigang culinary indulgence by preparing the star of the show – the beef ribs. Begin by rinsing the ribs under cold water and patting them dry. Cut the ribs into serving-sized portions, ensuring that they're small enough to fit comfortably in your cooking pot. This helps to ensure even cooking and maximize flavor infusion.

3: Sauteeing the Aromatics
In a large pot, heat a splash of oil over medium-high heat. Add the quartered onions and tomatoes, allowing them to sauté until they become aromatic and slightly softened. The combination of these two essential ingredients forms the flavor base of our Beef Ribs Sinigang.

4: Tenderizing the Beef Ribs
Once the aromatics are nicely sautéed, it's time to introduce the hero of our dish – the beef ribs. Add the ribs to the pot and stir them around, allowing them to brown slightly for a few minutes. The browning process adds depth and richness to the overall flavor profile. Now, pour ample water into the pot, covering the ribs completely. Bring the water to a boil, then reduce the heat to low and let it simmer for about 1 to 1.5 hours until the beef is wonderfully tender.

5: Adding the Sinigang Mix
Now, it's time to elevate our Beef Ribs Sinigang to the next level by incorporating the Sinigang sa Sampalok Original mix. Open the sinigang pack and sprinkle it into the pot, stirring gently to dissolve the flavorful mix into the broth. The tamarind-based mix adds that quintessential tanginess that Sinigang is known for.

6: Introducing the Vegetables
Once the beef ribs are tender and the sinigang mix is fully incorporated, it's time to invite the vegetables to join the party. Begin by adding the sliced radish, allowing it to cook for a few minutes until it softens slightly. Next, introduce the sliced eggplant and let it join the medley of flavors. Finally, add the sili sigang (green chili peppers) for that spicy kick, keeping in mind that the heat level can be adjusted according to your preference.

7: Embracing the Kangkong
To complete the symphony of flavors, add the kangkong leaves and stalks to the pot. These vibrant greens not only add a pop of color to the dish but also bring a unique earthy flavor that balances out the richness of the beef ribs. Allow the kangkong to wilt gently in the simmering broth, ensuring that it retains its freshness and crispness.

8: Adjusting the Seasoning
At this point, it's time to do a quick taste test. Sinigang is all about that perfect balance of flavors – the right amount of tanginess, saltiness, and spiciness. Adjust the seasoning, if needed, by adding more sinigang mix, salt, or chili peppers to achieve your desired flavor profile. Remember, cooking sinigang is an art, and personalizing the taste is what makes it unique.

9: Simmering to Perfection
Cover the pot and allow the flavors to meld together beautifully by simmering the Beef Ribs Sinigang for an additional 10-15 minutes. This final stage ensures that all the ingredients infuse together harmoniously, creating that signature sinigang flavor that everyone loves.

10: The Finale – Serve and Enjoy!
Congratulations! You've successfully created a steaming pot of Beef Ribs Sinigang. Dish out generous portions of the flavorful broth, accompanied by tender beef ribs and an array of vibrant vegetables. Pair it with steamed rice, and you're ready to embark on a culinary journey that showcases the best of Filipino comfort food. Now, savor each spoonful of this sinfully delicious soup, allowing the explosion of flavors to transport you to a world of pure gastronomic bliss.


Monday, August 21, 2023

A Hearty Delight: Filipino Classic Pancit Molo Recipe

In this blog post, learn how to cook Filipino Classic Pancit Molo – a heartwarming dish with minced pork dumplings enveloped by delicate molo wrappers in a flavorful broth. Join us on a delectable journey through the essence, ingredients, and steps to create this traditional Filipino delicacy. With aromatic garnishes and tips for variations, this Filipino classic is an irresistible addition to your culinary repertoire. Experience the authentic flavors and cultural heritage of Pancit Molo, guaranteed to satisfy your cravings and warm your soul.


Welcome to my kitchen, where we're about to embark on a mouthwatering journey to discover the traditional Filipino delicacy - Pancit Molo. Bursting with flavors, this comforting dish is a real treat for the senses. Get ready to amaze your loved ones with the authentic taste of Pancit Molo straight from the heart of the Philippines!

1: The Essence of Pancit Molo
If you're craving a warm and comforting bowl of soup with dumplings, then Pancit Molo is the answer. Originating from the city of Molo in Iloilo province, this dish has won the hearts of many Filipinos and has become a classic in Filipino cuisine. Pancit Molo is named after the Chinese wonton soup, Molo Soup, and is considered a staple during special occasions and family gatherings.

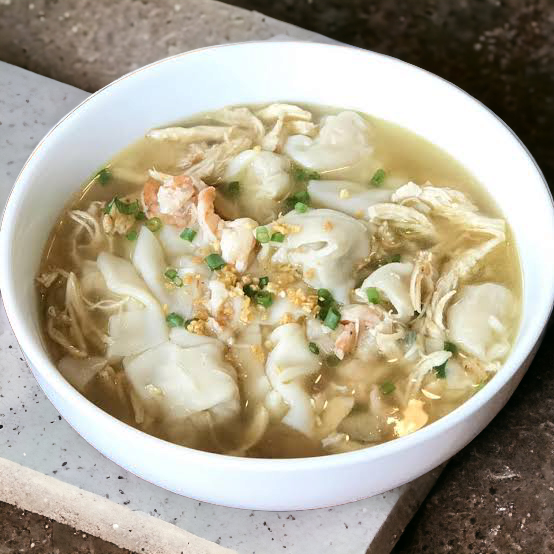
Pancit Molo features a dumpling filling made of ground pork, shrimp, and minced singkamas (jicama). This flavorful mixture is lovingly wrapped in delicate molo wrappers, creating bite-sized bundles of joy. The combination of rich broth, tender dumplings, and aromatic garnishes makes Pancit Molo a memorable dish that will keep you coming back for more.

2: Gathering the Ingredients
Before we delve into the cooking process, let's gather all the ingredients we need to create this delicious dish. Don't worry, these ingredients can easily be found at your local grocery store or Asian market.

Here's what you'll need:
- 1/4 pound ground pork
- 1 egg, beaten
- 3 pcs. Shrimp Broth Cubes
- 3 tablespoons cornstarch
- 1 cup minced singkamas (jicama)
- 20 molo wrappers (8 of them cut into strips)
- 1 tablespoon cooking oil
- 1 small onion, chopped
- 5 cloves garlic, minced and fried
- 3-4 cups water
- Ground black pepper, to taste
- 1 tablespoon chopped spring onions
- 1 tablespoon minced and fried garlic

3: Making the Dumpling Filling
To start, let's prepare the delicious dumpling filling. In a mixing bowl, combine the ground pork, beaten egg, minced singkamas, and half of the minced and fried garlic. Mix everything together, ensuring the ingredients are well-distributed throughout the mixture. Season with ground black pepper to add a burst of flavor.

Once the filling is well-mixed, it's time to shape the dumplings. Take a molo wrapper and place a spoonful of filling in the center. Fold the wrapper in half, making sure the edges are sealed by pressing firmly. Repeat this process until all the filling has been used.

4: Cooking the Flavorful Broth
Now that our dumplings are ready, let's move on to creating the rich broth that will infuse Pancit Molo with mouthwatering flavors. In a large soup pot, heat the cooking oil over medium heat. Add the chopped onion and sauté until it becomes translucent and fragrant.

Next, dissolve the shrimp broth cubes in water and pour the mixture into the pot with the sautéed onions. Bring the broth to a gentle boil, ensuring the flavors are well-incorporated. Once the broth begins to simmer, carefully add the dumplings one by one. Allow the dumplings to cook for about 10-12 minutes until they float to the surface, indicating that they are fully cooked.

5: Enhancing the Aroma
Now that we have the delicious dumplings swimming in a flavorful broth, let's take it up a notch by adding aromatic garnishes. Sprinkle the remaining fried garlic, chopped spring onions, and minced garlic over the top of the soup. These additions will lend Pancit Molo an irresistible fragrance and complete the dish with a final touch of elegance.

6: Serving and Enjoying Pancit Molo
Once all the components are beautifully combined, it's time to savor the delightful flavors of Pancit Molo. Ladle the piping hot soup into individual bowls, ensuring that each serving is generously portioned with dumplings. Drizzle some soy sauce and calamansi juice (or lemon juice) to add a tangy twist.

Pancit Molo is best enjoyed with loved ones, so gather your family or friends around the table and relish this heartwarming culinary experience together. The combination of flavors and textures will transport you to the streets of Molo, allowing you to appreciate the rich heritage of Filipino cooking.

7: Tips and Variations
- For a seafood twist, you can substitute the ground pork with ground shrimp or a mixture of shrimp and crab meat.
- If you're a vegetarian, you can skip the meat entirely and make vegetable dumplings using ingredients like minced tofu, mushrooms, and carrots.
- To save time, consider using pre-made molo wrappers available in the frozen section of your local Asian market or grocery store.
- Don't be shy to experiment with additional toppings such as chili oil, fried shallots, or a sprinkle of parmesan cheese to personalize this classic dish even further.

8: Storing and Reheating Pancit Molo
If you have leftovers or want to prepare this ahead of time, Pancit Molo can be stored in an airtight container and kept in the refrigerator for up to 3 days. To reheat, simply warm it in a pot over low heat, adding a little water if needed to maintain the soup's consistency.

9: The Irresistible Charm of Authentic Filipino Cuisine
Pancit Molo is just one of the countless Filipino dishes that have captured hearts worldwide. The warm and familiar flavors, along with the cultural significance of this classic recipe, highlight the rich culinary heritage of the Philippines. Whether you're a Filipino longing for a taste of home or an adventurous food lover seeking new flavors, Pancit Molo is guaranteed to satisfy your cravings.

Prepare to dive into a bowl of comfort and tradition with Pancit Molo. This Filipino classic with its delicate dumplings and flavorful broth offers a delightful dining experience that will leave you craving for more. With this easy-to-follow recipe, you can now recreate the authentic taste of Pancit Molo in the comfort of your own kitchen. Gather your loved ones, share the warmth, and enjoy this beloved Filipino delicacy together!


Sunday, August 20, 2023

Grilled Perfection: Master the Art of Cooking Juicy Pork Cutlets

Learn how to cook grilled pork cutlets to perfection with this easy-to-follow recipe. Trimmed pork cutlets marinated in Knorr Liquid Seasoning deliver juicy, flavorful results every time. Get ready to fire up the grill and impress your guests with this mouthwatering grilled pork dish!

Introduction:
Nothing beats the succulent goodness of perfectly grilled pork cutlets. The smoky aroma, charred edges, and juicy, tender meat make for a mouthwatering experience. In this ultimate guide, we will walk you through the steps to create grilled pork cutlets that are bursting with flavor. From selecting the right cut of meat to marinating and grilling tips, get ready to elevate your grilling game and become a grilled pork aficionado!

Section 1: Choosing the Perfect Cut of Pork
When it comes to grilling, selecting the right cut of pork is crucial. For this recipe, we recommend using pork cutlets that are trimmed, removing excess fat and skin. This ensures the meat cooks evenly and results in a more tender and flavorful dish. Aim for around 500 g of pork cutlets to serve 4 to 6 people, depending on portion sizes.

Section 2: Marinate for Flavors that Wow!
Marinating your pork cutlets before grilling is a game-changer when it comes to flavor. In a bowl, combine 5 tbsp of Knorr Liquid Seasoning and a generous sprinkling of ground black pepper. Use a fork to whisk the marinade until well combined. Place the pork cutlets in a resealable bag and pour the marinade over them. Massage the marinade into the meat, ensuring each piece is well-coated. Seal the bag and let it marinate in the refrigerator for at least 2 hours, or overnight for maximum flavor infusion.

Section 3: Preparing the Grill
Before you fire up the grill, make sure it's clean and brushed to avoid any unwanted flavors or residue from previous grilling sessions. If you're using a charcoal grill, allow the briquettes to heat until they turn ashen gray before placing the pork cutlets on the grates. For gas grills, preheat to medium-high heat, around 375°F (190°C), for optimal cooking.

Section 4: Grilling Techniques for Juicy Pork
When grilling pork cutlets, the key is to achieve a delicious char while keeping the meat tender and juicy. Place the marinated pork directly over the heat source, positioning each cutlet horizontally on the grates. Allow the pork to sear for about 3-4 minutes on each side, flipping once, until they develop a beautiful golden-brown crust. Use a meat thermometer to check the internal temperature, aiming for 145°F (63°C) for medium doneness.

Section 5: Resting and Serving
Once the pork cutlets reach the desired temperature, transfer them to a cutting board and let them rest for 5-10 minutes. This resting period allows the juices to redistribute, resulting in a more flavorsome and tender final product. After resting, slice the pork into thin strips against the grain for optimum tenderness and serve immediately.

Section 6: Perfect Pairings: Sides and Sauces
To complete your grilled pork cutlets experience, pair them with delicious sides and sauces. Classic choices include steamed vegetables, mashed potatoes, or a fresh garden salad. Additionally, consider serving a tangy and refreshing chimichurri sauce or a zesty barbecue sauce to complement the flavors of the grilled pork.

Section 7: Grilling Tips and Tricks
Grilling pork cutlets to perfection is an art that takes practice. Here are some valuable tips and tricks to ensure your next grilled pork adventure is a success:
- Keep an eye on the cooking time to prevent overcooking. Pork cutlets can dry out easily if left on the grill for too long.
- Basting the pork with the marinade throughout the grilling process will enhance the flavors and keep the meat juicy.
- Use tongs instead of a fork to flip the pork cutlets. Piercing the meat with a fork will cause the flavorful juices to escape.
- Season with salt after grilling to avoid drawing moisture out of the pork, which could result in a drier final product.

Section 8: Grilled Pork Variations to Explore
Once you've mastered the basic grilled pork cutlet recipe, you can experiment with various flavors and ingredients to add excitement to your grilling sessions. Try incorporating different marinades, such as a spicy Sriracha and honey glaze or a zesty orange and ginger infusion. You can also explore different cuts of pork, such as pork tenderloin or boneless pork chops, for a range of textures and flavors.

Section 9: Leftover Magic: Reinventing Grilled Pork
If you happen to have leftovers, don't worry! Grilled pork cutlets can be transformed into delicious sandwiches, tacos, or stir-fried rice dishes. Thinly slice the leftover pork and use it as a flavorful addition to your favorite recipes, ensuring that no juicy goodness goes to waste.

Section 10: Grilled Pork Cutlets: A Crowd Pleaser
Grilled pork cutlets are the epitome of crowd-pleasing dishes. Whether you're hosting a backyard barbecue or a casual get-together, this recipe is guaranteed to win over friends and family. The combination of smoky flavors, tender meat, and the umami-rich Knorr Liquid Seasoning marinade will leave everyone craving for more.

In conclusion, mastering the art of cooking grilled pork cutlets is within your reach. By following this comprehensive guide, you'll be able to create a tantalizing dish that will impress even the most discerning palates. So why wait? Fire up the grill, gather your loved ones, and indulge in the incredible flavors of perfectly grilled pork cutlets – your taste buds will thank you!


Saturday, August 5, 2023

The Ultimate Guide to Master the Art of Cooking Crispy and Juicy Fried Chicken


Welcome, fellow food lovers and aspiring home cooks! If you've ever craved that perfectly crispy, golden-brown coating with tender and juicy meat inside, then you're in for a treat. In this blog post, we'll unravel the secrets of cooking the most irresistible fried chicken. From choosing the right ingredients to nailing the cooking technique, get ready to embark on a finger-licking adventure in your own kitchen!

The Ingredients that Make the Magic Happen

The Essential Ingredients for Finger-Lickin' Good Fried Chicken

Let's start with the star of the show - the chicken! Make sure to grab around 1 kg of fresh chicken, preferably bone-in pieces, for maximum flavor and juiciness. Whether you prefer drumsticks, wings, or thighs, the choice is yours. Remember, good quality chicken is key to excellent fried chicken.

Now, let's talk about the seasoning. You'll need half a teaspoon of freshly ground pepper to give your chicken that vibrant kick. Pepper adds depth and enhances the overall flavor of the dish. Don't hold back on this ingredient; a little bit of spice goes a long way!

Mastering the Coating
The Art of Creating the Perfect Coating

The crispy coating is what sets fried chicken apart, and it's time to unlock the secret behind it. Start with a cup of all-purpose flour. This versatile flour will provide the right texture and absorbency for a satisfying crunch. Feel free to experiment with different seasonings like paprika, garlic powder, or even a pinch of cayenne pepper for an extra kick!

Transfer the flour mixture into a shallow dish or bowl, ensuring it's well-seasoned. Dredge each chicken piece thoroughly, making sure to coat it evenly, allowing the flour mixture to cling onto the chicken, creating a delightful crunch when fried. Don't be afraid to get your hands dirty - it's all part of the fun!

The Cooking Process
Frying to Perfection: The Optimal Cooking Technique

Heat up a cup of vegetable oil in a skillet or deep frying pan. Moderate heat is the key here – you want it hot enough to sizzle and create that beautiful golden coat without burning. Drop a tiny pinch of the flour mixture into the oil; if it starts bubbling right away, your oil is ready for action!

Now, carefully place the coated chicken into the hot oil and let it fry for a few minutes on each side until it turns a beautiful golden brown. Ensure the chicken is cooked thoroughly by testing the internal temperature, which should reach at least 165°F (74°C) to ensure food safety.

Serving Suggestions
The Perfect Sidekicks: Accompaniments for Your Fried Chicken Feast

Fried chicken is a versatile dish that pairs well with a variety of side dishes. Go for classic comfort food options such as creamy mashed potatoes, buttery cornbread, or crispy french fries. For a healthier option, opt for a crisp salad with tangy vinaigrette to balance out the richness of the fried chicken.

Don't forget to serve your fried chicken with zesty sauces like tangy barbecue, spicy buffalo, or creamy ranch for an extra burst of flavor. These condiments elevate the taste and add a delightful twist to each bite.

Leftover Love

Reviving Yesterday's Crunch:

Reimagining Leftover Fried Chicken

Sometimes we're left with a few leftover pieces of fried chicken, and that's when creativity comes into play. One great idea is to repurpose it into a delicious chicken sandwich. Simply slice the chicken into manageable pieces, add your favorite condiments, veggies, and some melted cheese, then sandwich it all between two soft buns for a crispy and succulent treat.

Alternatively, you can chop up the leftover fried chicken and add it to a salad for a protein-packed twist. Add some fresh greens, cherry tomatoes, cucumbers, and a tangy dressing for a satisfying, guilt-free meal.

Now that you've learned the secrets behind cooking crispy and juicy fried chicken, it's time to take your newfound skills to the kitchen. Remember, practice makes perfect, so don't be discouraged if your first attempt doesn't reach perfection. Keep experimenting, adjusting, and enjoying the process. Get ready to impress your friends and family with your homemade fried chicken masterpiece!

Thursday, August 3, 2023

Introducing Chicken Sinigang: A Filipino Delicacy


Learn how to cook Chicken Sinigang, a mouthwatering Filipino soup filled with tender chicken, crisp vegetables, and tangy tamarind broth. This easy-to-follow recipe will guide you through every step, from preparing the ingredients to serving a piping hot bowl of this comforting dish. 


1: A Taste of Tradition
Chicken Sinigang is a beloved Filipino dish that captures the essence of traditional cuisine. With its rich and tangy broth, tender chicken, and vibrant vegetables, it is a hearty and satisfying meal perfect for any occasion. Whether you are looking to explore new flavors or crave the nostalgic taste of home, Chicken Sinigang is sure to leave a lasting impression.

2: Gather the Ingredients
Before diving into the cooking process, make sure you have all the necessary ingredients ready. You will need 1 lb of chicken, cut into serving pieces, 22 g of Sinigang sa Sampaloc mix with gabi, 5 okra, 10 string beans cut into 2-inch pieces, 2 cups of spinach, 1 long green pepper, 2 tomatoes quartered, 1 onion quartered, 2 thumbs of ginger crushed, 2 cloves of garlic chopped, 6 cups of water, 2 teaspoons of cooking oil, and fish sauce and ground white pepper to taste.

3: Prepare the Chicken and Vegetables
Start by preparing the chicken. Cut it into evenly-sized serving pieces, ensuring that each piece has both meat and bone. This will add depth of flavor to the soup. Rinse the chicken thoroughly under cold water, then pat it dry with paper towels.

4: The Art of Sauteing
To bring out the flavors of the ingredients, we will begin by sautéing the onions, garlic, and ginger. In a large pot, heat 2 teaspoons of cooking oil over medium-high heat. Once the oil is hot, add the chopped garlic and sauté until fragrant. Then, add the onions and ginger, and continue to sauté until the onions become translucent.

5: The Importance of Broth
Now, let's talk about the star of the show – the broth. In a separate bowl, dissolve the Sinigang sa Sampaloc mix with gabi in 6 cups of water. Make sure to mix it well, ensuring that there are no lumps. Once the onions have turned translucent, pour the broth into the pot, and stir gently to combine all the flavors.

6: Bring on the Chicken
It's time to add the chicken to the pot. Gently place each piece into the simmering broth, making sure they are fully submerged. Allow the chicken to cook for about 20 minutes, or until it becomes tender and starts to fall off the bone. Keep an eye on the pot and skim off any impurities that rise to the surface.

7: Adding the Vegetables
After the chicken has cooked for 20 minutes, it's time to introduce the vegetables. Start by adding the okra, followed by the string beans and tomatoes. These vegetables lend a delightful crunch and add a pop of color to the soup. Stir gently to combine and let everything cook for another 5-7 minutes.

8: The Finishing Touches
To complete the dish, add the long green peppers and spinach to the pot. The peppers will add a subtle heat, while the spinach brings a fresh and vibrant element to the soup. Season with fish sauce and ground white pepper to taste, adjusting the flavors according to your preference. Allow the soup to simmer for another 2-3 minutes, until the spinach has wilted and the flavors have melded together beautifully.

9: Serving and Enjoying
Once the Chicken Sinigang is ready, it's time to serve and enjoy. Fill each bowl with a generous amount of the soup, making sure to include a variety of vegetables and a few pieces of tender chicken. Accompany it with a side of steamed rice for a complete and satisfying meal. Allow yourself to savor the delightful flavors, the comforting warmth, and the familiar taste of home.

10: Share the Tradition
Chicken Sinigang is not just a recipe; it is a way of celebrating Filipino culture and tradition. Share this delicious dish with your friends and family, introducing them to the vibrant flavors and heartwarming experience it offers. Take pride in preserving the heritage of Filipino cuisine by passing on this cherished recipe for generations to come.